Difference between revisions of "Documentation/3.4"
m (moved Documentation-3.4 to Documentation/3.4) |
|||
| Line 1: | Line 1: | ||
| − | + | {{documentation/versionlist}} | |
=Introduction= | =Introduction= | ||
Revision as of 03:12, 15 April 2012
Home < Documentation < 3.4Nightly 4.10 4.8 4.6 4.5 4.4 4.3 4.2 4.1 4.0 3.6 3.5 3.4 3.2 ALL VERSIONS
Contents
- 1 Introduction
- 2 How-To Tutorials
- 3 Feature Request and Problem Reports
- 4 System Requirements
- 5 List of Modules
- 6 Extensions for Downloading
- 7 XNAT Desktop and FetchMI
- 8 FreeSufer Integration
- 9 Requirements for modules to be added to the release
Introduction
This page is a portal for documentation about Slicer 3.4. For information for software developers, please go to the Developers page (see link in navigation box to the left).
How-To Tutorials
Feature Request and Problem Reports
We have an issues tracker for Slicer 3. You need to create an account for filing reports. We keep track of both feature requests and bug reports. Make sure to use the pull-down in the upper right to select Slicer 3.
System Requirements
- Hardware: The hardware requirements are driven by the kind of analysis you wish to perform. For large data sets we suggest the 64 bit linux build on a machine with several gig of memory (e.g. a 1000 slice CT is half a gig of memory just to load plus there are temporary copies in memory during any processing steps). Note that Windows often does not make the full system memory available to applications.
- Disk Space: In addition to the installation directory (about 200 meg depending on platform), operations like installing downloaded extensions, caching internet data downloads, and running external programs will require additional memory; the exact amount depends on the operations you perform. To be safe, an extra gig or more of free disk space is a good idea for "typical" uses such as neuro MR analysis.
- Directory Settings: There are several user-selectable directory paths. Please confirm that these paths point to locations with sufficient storage space for your intended use.
- View->Application Settings->Module Settings->Temporary Directory is used as scratch space when running modules. By default this points to a new temp directory in your home directory.
- View->Application Settings->Module Settings->Extensions Install Path is where newly downloaded extension modules will be saved.
- View->Application Settings->Remote Data Handling Settings->Cache Directory is where downloaded data is stored for possible re-use. This defaults to the same as the Temporary Directory.
List of Modules
Overview
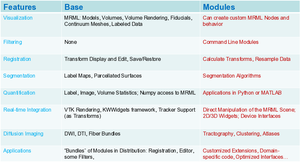
- The documentation on this page has been created for Slicer 3.4 and discusses the features and capabilities of menu items and panels. It is intended to be used as a live reference manual. This is a wiki. You are welcome to add to the content and improve it.
- In addition to the hundereds of smaller changes and improvements to Slicer in general, there are two substantial new addtions to Slicer 3.4:
Main GUI
- Main Application GUI (Wendy Plesniak)
- "Hot-keys" and Keyboard Shortcuts (Wendy Plesniak)
- Loading Scenes and Individual Datasets through the Data Module (W Plesniak)
- Data Loading Details (Steve Pieper)
- Saving Scenes and Data (Wendy Plesniak)
- Creating and Restoring Scene Snapshots (Alex Yarmarkovich & Steve Pieper)
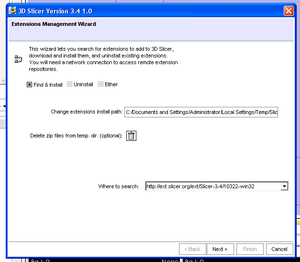
- Extensions Management Wizard (Terry Lorber)
Modules
- Please copy the template linked below, paste it into your page and customize it with your module's information.
Slicer3:Module_Documentation-3.4_Template
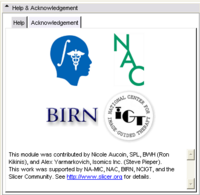
- See above for info to be put into the Help and Acknowledgment Tabs
- To put your lab's logo into a module, see here for plugin module, and here for loadable module.
Core
- Welcome Module (Wendy Plesniak, Steve Pieper, Sonia Pujol, Ron Kikinis)
- Volumes Module (Alex Yarmarkovich, Steve Pieper)
- Diffusion Editor (Kerstin Kessel)
- Models Module (Alex Yarmarkovich)
- Fiducials Module (Nicole Aucoin)
- Data Module (Alex Yarmarkovich)
- Slices Module (Jim Miller)
- Color Module (Nicole Aucoin)
- Interactive Editor (Steve Pieper)
- ROI Module (Alex Yarmarkovich)
- Volume Rendering Module (Alex Yarmarkovich)
Additional modules may appear in this section of the menu if they are not otherwise categorized by the developer.
Specialized Modules
Please adhere to the naming scheme for the module documentation:
- [ [Modules:MyModuleNameNoSpaces-Documentation-3.4|My Module Name With Spaces] ] (First Last Name)
- PETCTFusion (Wendy Plesniak)
Wizards
- ChangeTracker (Andriy Fedorov)
- IA FE Meshing Module (Vince Magnotta)
Informatics Modules
- Fetch Medical Informatics Module (Wendy Plesniak)
- QDEC Module (Nicole Aucoin)
- Query Atlas Module (Wendy Plesniak)
Registration
Segmentation
- EM Segment Command-Line (Brad Davis, Will Schroeder)
- EM Segment Simple (Brad Davis, Will Schroeder)
- EM Segment Template Builder (Brad Davis, Will Schroeder)
- Simple Region Growing (Jim Miller)
- Otsu Threshold (Bill Lorensen)
Statistics
- Label Statistics (Steve Pieper)
Diffusion
DWI
- Estimation
- Diffusion Tensor Estimation (Raul San Jose Estepar)
- Python Extract Baseline DWI Volume (Julien de Siebenthal)
- Filter
- Joint Rician LMMSE Image Filter (Antonio Tristán Vega, Santiago Aja Fernandez)
- Rician LMMSE Image Filter (Antonio Tristán Vega, Santiago Aja Fernandez, Marc Niethammer)
- Unbiased Non Local Means filter for DWI (Antonio Tristán Vega, Santiago Aja Fernandez)
- Python Shift DWI Values (Julien de Siebenthal)
- Python Recenter Scalar to DWI Volume (Julien de Siebenthal)
DTI
- Resample DTI Volume (Francois Budin)
- Diffusion Tensor Scalar Measurements (Raul San Jose Estepar)
- Analysis
Tractography
- Label Seeding (Raul San Jose Estepar)
- Fiducial Seeding (Alex Yarmakovich, Steve Pieper)
- FiberBundles (Alex Yarmakovich)
- Python Stochastic Tractography (Julien de Siebenthal)
IGT
- OpenIGTLinkIF Module (Junichi Tokuda)
- NeuroNav Module (Haiying Liu)
- ProstateNav Module (Junichi Tokuda)
Filtering
- Checkerboard Filter (Bill Lorensen)
- Histogram Matching (Bill Lorensen)
- Image Label Combine (Alex Yarmarkovich)
- Resample Volume (Bill Lorensen)
- Resample Volume2 (Francois Budin)
- Threshold Image (Nicole Aucoin)
- Arithmetic
- Add Images (Bill Lorensen)
- Subtract Images (Bill Lorensen)
- Cast Image (Nicole Aucoin)
- Denoising
- Gradient Anisotropic Filter (Bill Lorensen checked this in)
- Curvature Anisotropic Diffusion (Bill Lorensen)
- Gaussian Blur (Julien Jomier, Stephen Aylward)
- Median Filter (Bill Lorensen)
- Morphology
- Voting Binary Hole Filling (Bill Lorensen)
- Grayscale Fill Hole (Bill Lorensen)
- Grayscale Grind Peak (Bill Lorensen)
Surface Models
- Modelmaker (Nicole Aucoin)
- Grayscale Model Maker (Bill Lorensen)
- Freesurfer Surface Section Extraction (Katharina Quintus)
- Python Surface Connectivity (Luca Antiga, Daniel Blezek)
- Python Surface ICP Registration (Luca Antiga, Daniel Blezek)
- Python Surface Toolbox (Luca Antiga, Daniel Blezek)
- Clip Model (Alex Yarmarkovich)
- Model into Label Volume (Nicole Aucoin)
Batch processing
- EM Segmenter batch (Julien Jomier, Brad Davis)
- Gaussian Blur batch (Julien Jomier, Stephen Aylward)
- Register Images batch (Julien Finet, Stephen Aylward)
- Resample Volume batch (Julien Finet)
Converters
- Create a Dicom Series (Bill Lorensen)
- Dicom to NRRD (Xiaodong Tao)
- Orient Images (Bill Lorensen)
- Python Explode Volume Transform (Luca Antiga, Daniel Blezek)
- Extract Subvolume (Steve Pieper)
Work in Progress
Various tools in development will appear here depending on the version of slicer you are using.
Developer Tools
- Python Script (Luca Antiga, Daniel Blezek)
- Python Numpy Script (Luca Antiga, Daniel Blezek)
- Execution Model Tour (Daniel Blezek, Bill Lorensen)
- Scripted Module Example (Steve Pieper)
Extensions for Downloading
Work is in progress to create infrastructure for searching and loading extensions. See Slicer3:Extensions for more information.
- This will allow contributors and software developers to post their own Slicer extensions and have them compiled against the "official" versions of Slicer.
- Users can browse these contributed extensions and install them on their own versions of Slicer.
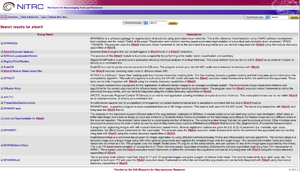
We are currently using NITRC as a repository for contributed extensions. As a general rule, we do not test them ourselves, it is the downloaders job to ensure that they do what they want them to do.
Click here to see a listing of Slicer 3 extensions on NITRC.
To add extension modules to an installed binary of slicer:
- Use the View->Extension Manager menu option
- The dialog will be initialized with the URL to the extensions that have been compiled to match your binary of slicer.
- Note installing extensions from a different repository URL is likely to be unstable due to platform and software version differences.
- You can select a local install directory for your downloaded extensions (be sure to choose a directory with enough free space).
- Select the extensions you wish to install and click to download them. Installed extensions will be available when you restart slicer.
- To turn modules on or off, you can use the Module Settings page of the View->Application Settings dialog.
XNAT Desktop and FetchMI
- Work is underway to use XNAT desktop (xnd) as a local database for Slicer. This database will exist in parallel with the other load and save mechanisms and will allow to download/upload individual files or entire scenes with all their dependent files.
- Users of Slicer will have to install xnd on their computer. Once set up, the FetchMI interface will allow users to upload and download mrml scenes with all the dependent files, or individual volumes, models, other components of slicer scenes.
- See here for a link to the download site for xnd. See here for documentation on how to install XNAT desktop on your computer.
- On Macs and Linux you currently have to change permissions of the executable after installation.
- In the future (summer 2009) xnd will be able to upload and download mrml scenes to xnat enterprise.
- FetchMI is the current interface inside slicer for exploring information stored in xnd and down and upload such data. It is a "sandbox" implementation to help us understand how users will want to use remotely stored data and metadata in the Slicer environment. Eventually, FetchMI's remote load and save will be integrated with Slicer's existing load and save interfaces, and FetchMI's data tagging functionality will be more fully developed as a new metadata authoring module.
- See here for more information about FETCHMI. User comments and suggestions are welcome.
FreeSufer Integration
- FreeSurfer surfaces and scalar overlays can be loaded via the Models module and MGZ volumes can be loaded via the File -> Add Data widget.
- More detailed information can be found here.
Requirements for modules to be added to the release
|
Examples for the Help and
Acknowledgment Panels |


