Slicer3:XND
Contents
- 1 Important Note
- 2 Example: Uploading data (non-dicom) to central.xnat.org using XNAT Desktop
- 2.1 Manage files to upload
- 2.2 Select tags for local data
- 2.3 Provide tag values for files you want to upload
- 2.4 Switch to tag view and check data description
- 2.5 Fixing misspecified tags
- 2.6 Create a project on the hosted repository
- 2.7 New project on hosted repository should correspond to local data description
- 2.8 Create a subject for each subject in the data to be uploaded
- 2.9 New subjects should correspond to local data description
- 2.10 Upload files to the hosted repository
- 2.11 Check progress in the XND console
- 2.12 Check hosted repository for upload results
- 2.13 Adding more data to the project on hosted repository
- 3 Downloading an XNAT catalog of selected data from central.xnat.org
- 4 Loading an XNAT catalog into Slicer3
Important Note
This tutorial was created using XNAT Desktop 0.2. A new version (0.3) is now available, with slightly different interface and functionality. Until this example is updated to reflect those changes, it remains very easy to translate between the steps here and the new presentation layer and functionality.
Some differences between the two are listed here to help in the translation between versions:
- Remove and Remove all in the dropdown menu have been changed to Unmanage and Unmanage all
- Now multiple experiments can be uploaded at once, rather than having to upload each experiment independently.
- Delete in the dropdown menu has been changed to Unmanage root directory
- The set of tags available to choose in the Manage tags or Manage local tags interface is a little different.
- The Set Predefined Tags or Set default tags reflects those new tags.
- The console view is now persistent on the interface bottom, rather than being optionally exposed in a tab.
Example: Uploading data (non-dicom) to central.xnat.org using XNAT Desktop
Manage files to upload
First, select local directories/folders or individual files to manage with XNAT Desktop.
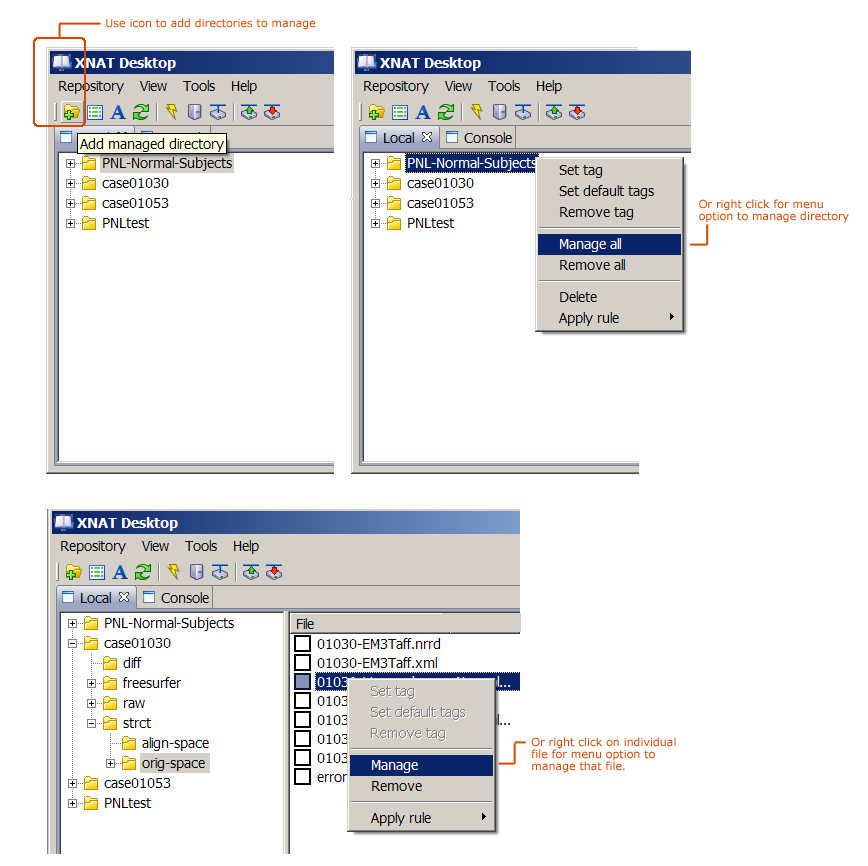
Select the Add managed directory icon, choose Repository->Add dir, or right click on a directory/folder for a menu option to manage that folder with XNAT Desktop, as shown below. Or, right click on an individual file for a menu option to manage that file.
Select tags for local data
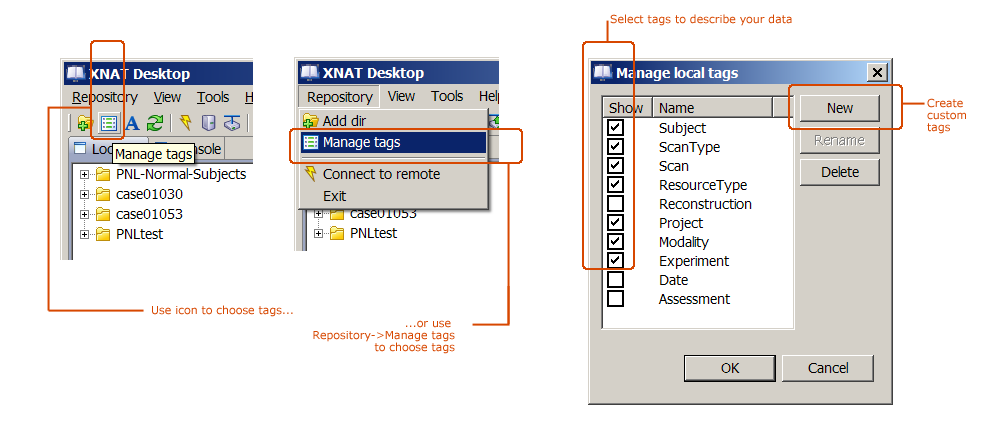
Next, choose tags for describing your data using the icon on the toolbar, or the Repository->Manage tags menu option. XNAT has a set of default tags that are important to use, and custom tags can be added using the "New" option on the pop-up, as shown below.
Provide tag values for files you want to upload
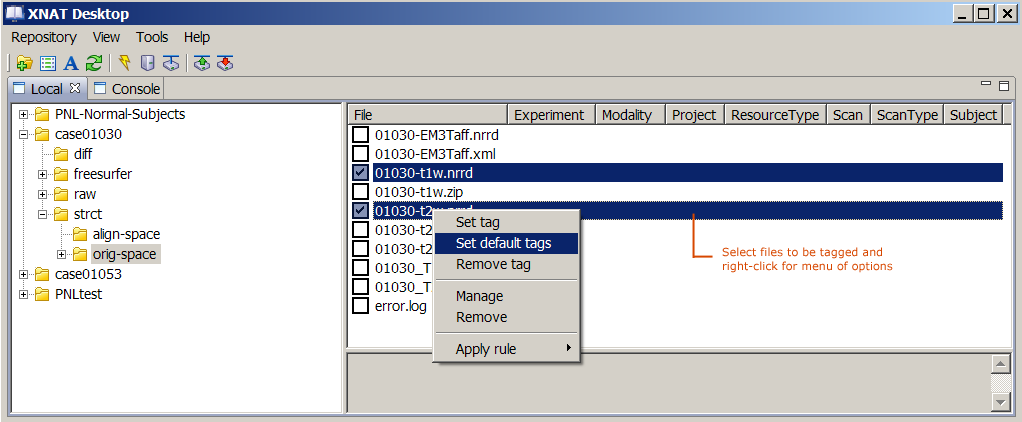
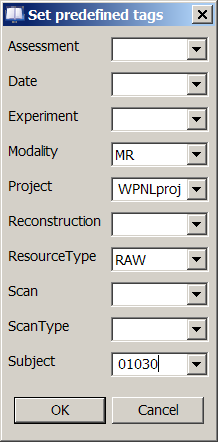
Using the "Set Default tags" option, select datasets to be described, and quickly add values for the tags you chose in the previous step. These values will apply to all selected datasets.
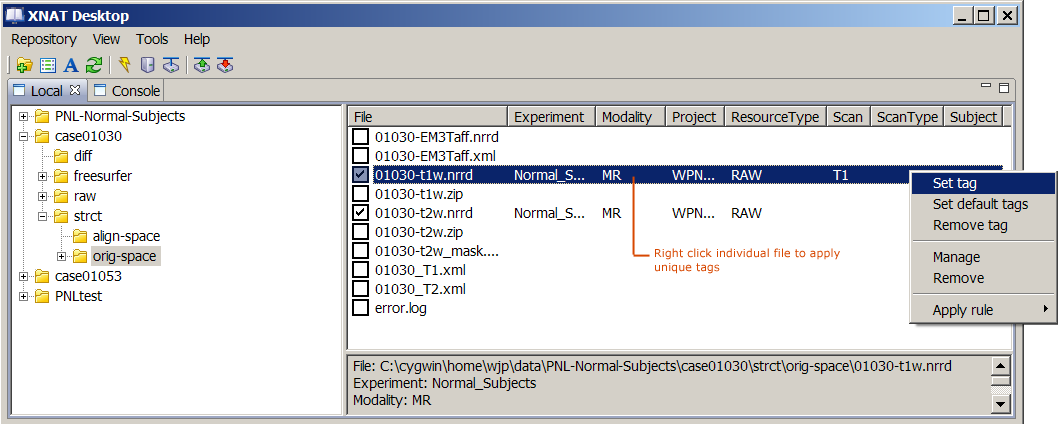
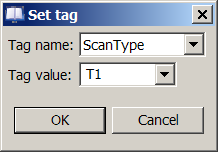
Or select individual datasets to be described, and add values for appropriate tags to each through the "Set tag" menu option. Note, in this example, the Experiment tag for each subject 01030 and 01053 are unique: Normal_Subjects_01030 and Normal_Subjects_01053, respectively.
Switch to tag view and check data description
"Tag view" organizes all tagged data according to its description. This view makes it easy to notice and fix errors in the data description.
Fixing misspecified tags
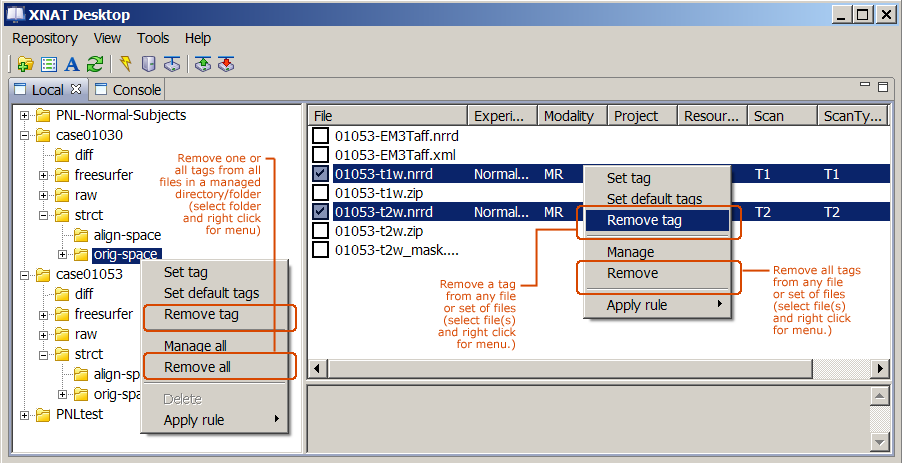
Any or all tags can be removed from managed files using the "Remove tag" or "Remove all" menu options as shown below (in "Folder view"). If you see any errors, remove a tag, and re-specify its value if appropriate.
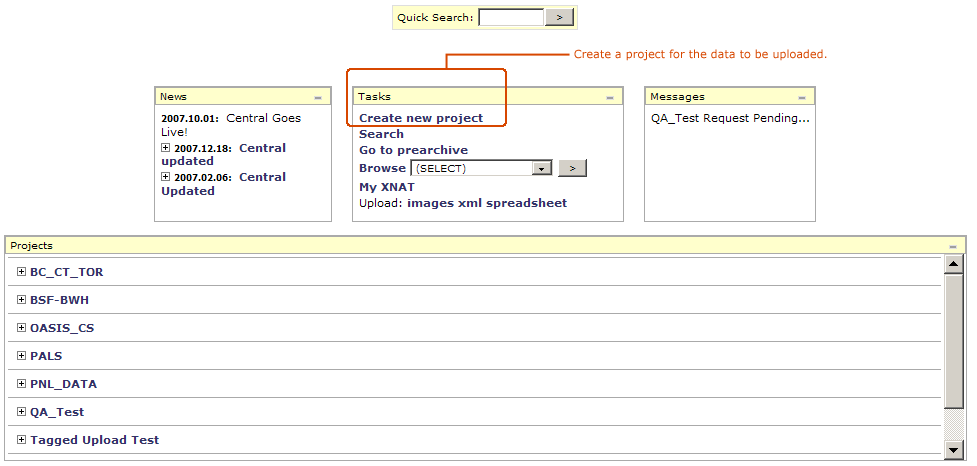
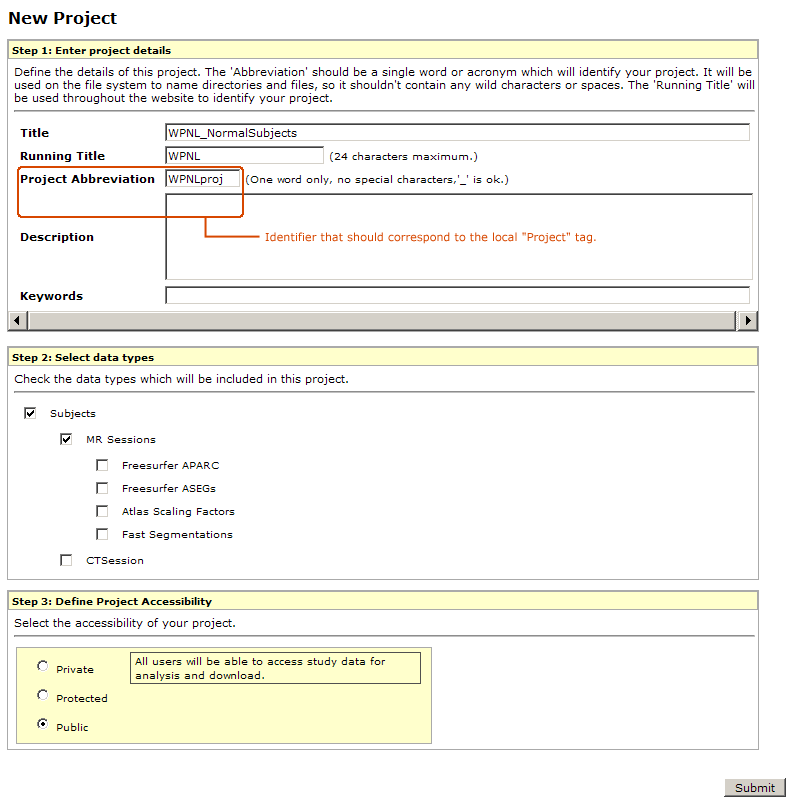
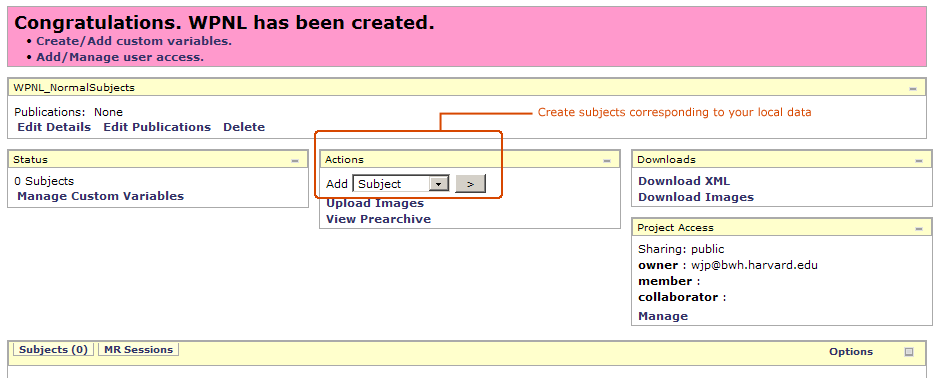
Create a project on the hosted repository
In this example, the hosted respository is http://central.xnat.org
New project on hosted repository should correspond to local data description
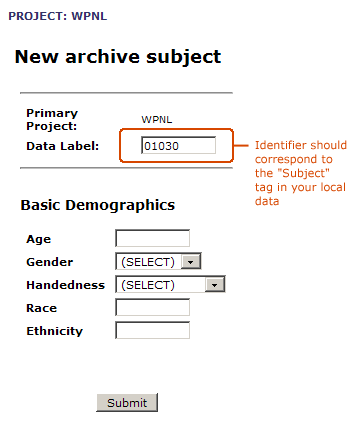
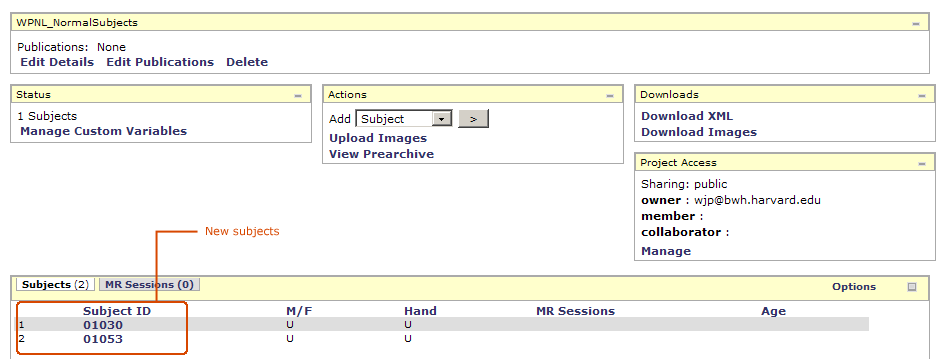
Create a subject for each subject in the data to be uploaded
New subjects should correspond to local data description
Adding subject 01030.
Project display after adding two subjects.
Upload files to the hosted repository
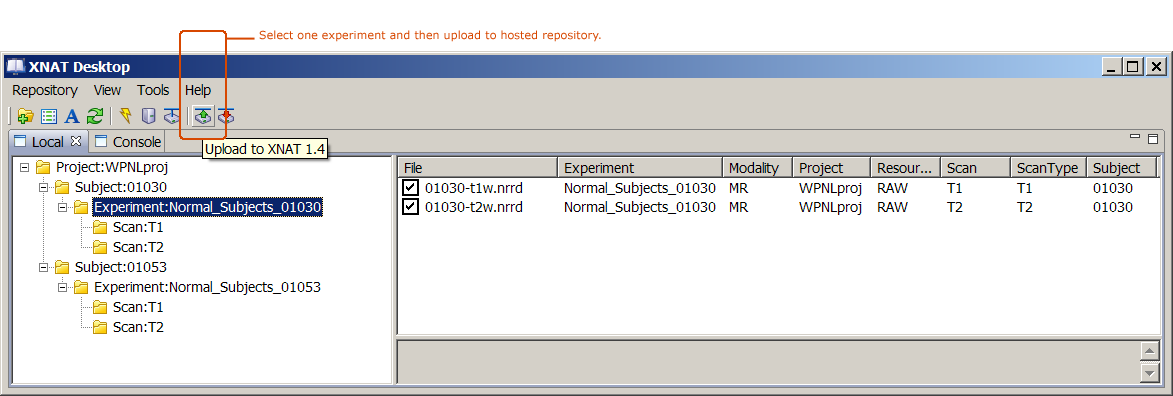
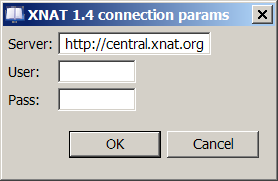
The current release version of XNAT Desktop actually can only upload one experiment at a time. Using this version, to upload each experiment, select it in the tag view hierarchy and use the upload tool as shown below.
A new version of XNAT Desktop to be released soon supports uploading multiple experiments, and has also a number of important upload bug fixes.
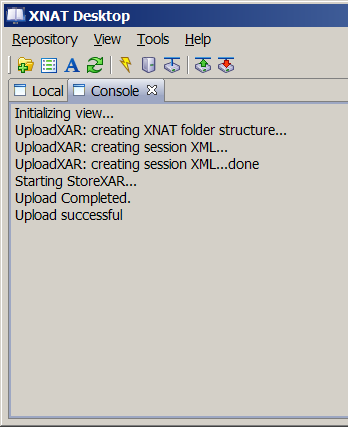
Check progress in the XND console
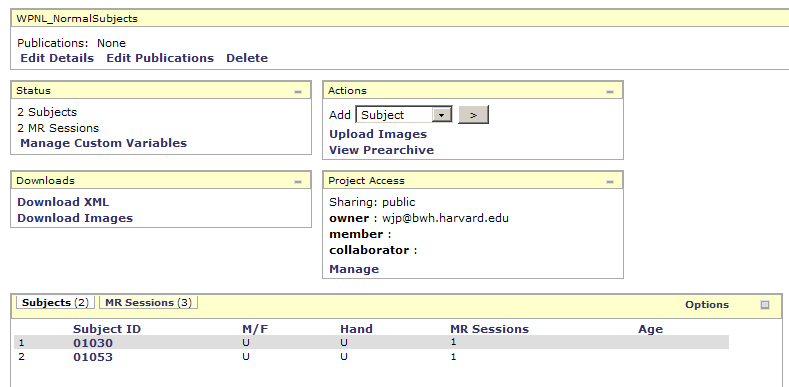
Check hosted repository for upload results
Adding more data to the project on hosted repository
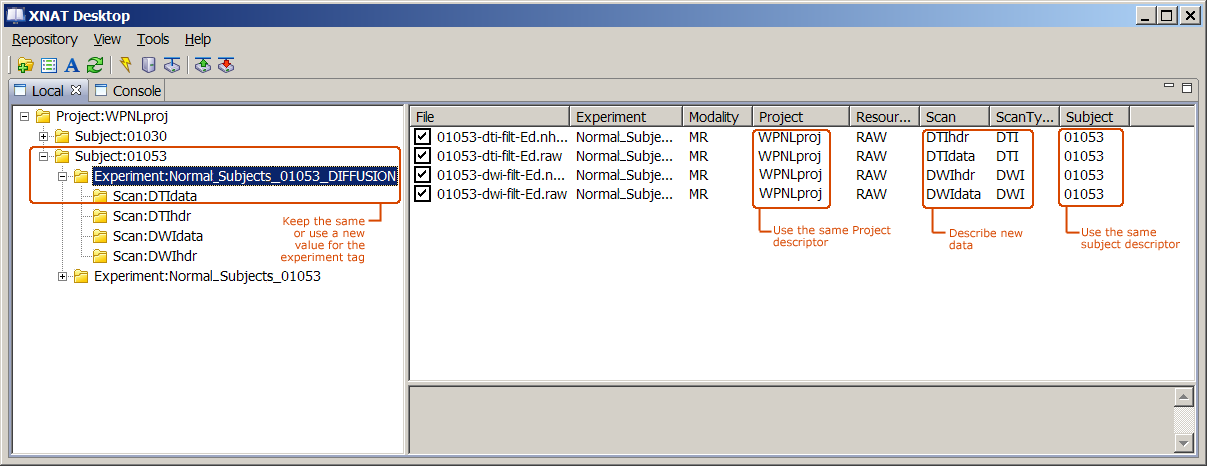
To add more data to an existing subject in the same project on the hosted repository, first manage the new data you wish to add, choose tags for the new data and add values to those tags. You may decide to use the same value for the Experiment tag, or a new value as shown below in this example. Be sure to use the same value for the Project and Subject tags as you did for the previous upload of data for that Project/Subject so this new data will be correctly associated in the repository.
Then select the experiment and upload the data as before. Progress can be tracked in the Console view, and when uploading is finished and successful, the hosted repository can be checked to make sure that the data is uploaded and represented as intended.
Downloading an XNAT catalog of selected data from central.xnat.org
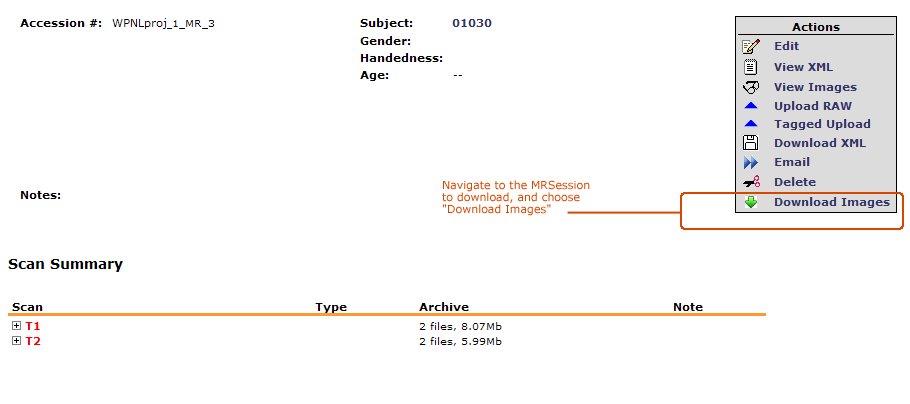
On central.xnat.org, navigate to the Project and MR Session of interest. Then, choose "Download Images" from the options provided, as shown below.
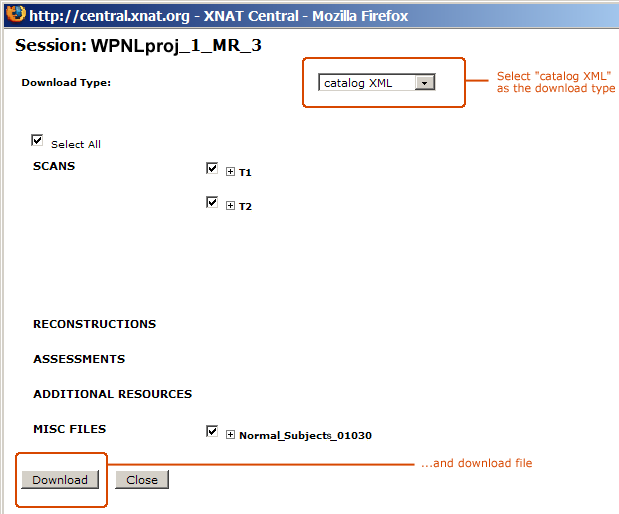
In the pop-up dialog, make sure to choose "catalog XML" as the format for your download. Select only the datasets you'd like to include in the catalog. Important note: Slicer3's current implementation can only handle single data files. Datasets represented by separate header and data files (like Analyze), or multiple data files (like DICOM) will not currently work with Slicer. This functionality is currently being developed. When you've configured the download request, click the download button as shown in the figure below.
Loading an XNAT catalog into Slicer3
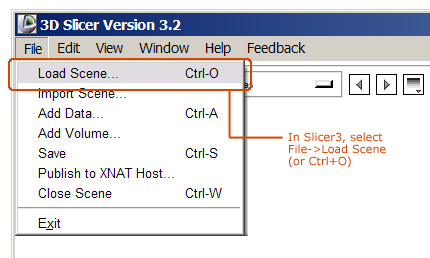
To load the catalog into Slicer3, start up the application, and choose "File->Load" from the Application Menubar.
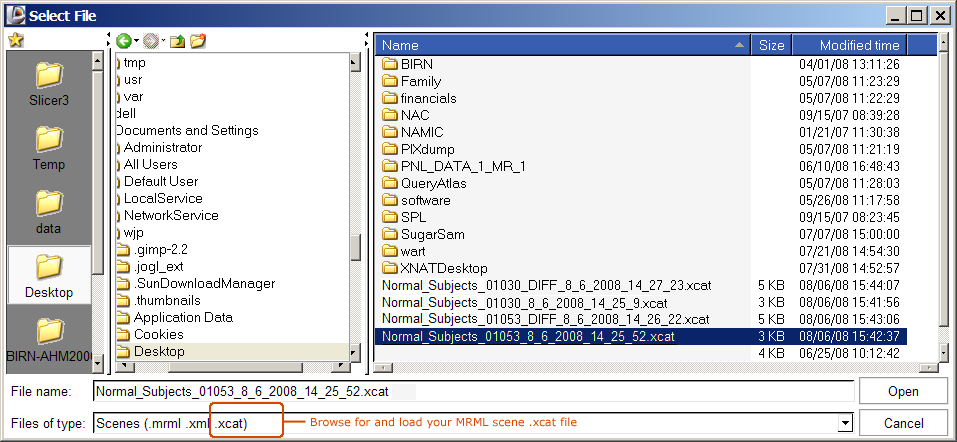
In the File browser that is raised, select all scene files, or filter on just .xcat files. Select the catalog file you wish to open as shown below. The Cache and Remote I/O Manager dialog should raise and show you the status and progress of the download process.
