Modules:ChangeTracker-Documentation-3.6
Return to Slicer 3.6 Documentation
ChangeTracker
General Information
Module Type & Category
Type: Interactive
Category: Wizards
Authors, Collaborators & Contact
- Andriy Fedorov, SPL
- Kilian Pohl, IBM Research/SPL
- Ron Kikinis, SPL
- Contact: Andriy Fedorov, fedorov at spl dot bwh dot edu
Module Description
ChangeTracker is a software tool for quantification of the subtle changes in pathology. The module provides a workflow pipeline that combines user input with the medical data. As a result we provide quantitative volumetric measurements of growth/shrinkage together with the volume rendering of the tumor and color-coded visualization of the tumor growth/shrinkage.
ChangeTracker is not yet a generic tool for detecting small changes. It has been tuned specifically for meningioma growth analysis. Specifically, the assumptions made by ChangeTracker are
- the analyzed images are roughly aligned
- the pathology area is characterized by bright image intensities (contrast-enhanced meningioma MRI)
- images have similar, close to isotropic, spacing
- the change in pathology between the consequtive scans is small in relation to the total pathology volume
If you want to apply ChangeTracker on non-meningioma data, please let us know. The algorithm is likely to require tuning of the parameters for registration and other processing steps.
Usage
Use Cases, Examples
- The module has been designed and tested for measuring meningioma development.
- Detecting subtle change in pathology tutorial: slides, data
Tutorials
| The supplemental data for the tutorial can be loaded automatically (you need to have access to the Internet to do this). Go to the "Help and Acknowledgment" tab, and hit "Load tutorial data" button. |
Quick Tour of Features and Use
ChangeTracker uses workflow processing of the input data guided by minimal user interaction. There are 4 processing steps.
- Step 1: Define input scans
| Use drop-down controls to choose the two scans where you would like to measure pathology development. Currently, we support analysis of the images that correspond to two time points. Extending of the module to accept more than two time points is the feature under development.
Note, that ChangeTracker does not "see" transforms located above volume nodes in the MRML hierarchy. If you want any transform in the MRML tree to be used as the initial pose of the image, you will need to create a new volume by resampling the original volume. Slicer3 module ResampleVolume2 can be used for this purpose. |
- Step 2: Define volume of interest
This step of wizard includes the following user controls to facilitate Volume of Interest (VOI) selection:
- "Hide/show render" button: used to control visibility of volume rendering for the selected region
- "Reset" button: reset the selected region to start over
- "ROI Widget Controls: RAS Space" frame: contains sliders to initialize VOI in RAS (physical) space
"ROI Widget" refers to the three-dimensional selection box that appears in the 3d slice view once you begin to select VOI.
You can define VOI using either one or combination of the following methods:
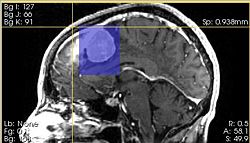
- Red/Yellow/Green Slice view bounding box: click left mouse button to define the coordinates of the bounding box that encloses analyzed target in the image. Click right mouse button to re-center the ROI. Volume of interest is highlighted in the slice views by semi-transparent blue overlay.
- 3d Slice view: use the ROI Widget controls to resize and/or drag the VOI
- Slider controls: use the slider controls in the wizard frame to resize or move VOI
Note, that the last method is recommended only if you want to enter the VOI parameters you already know. This method is not practical to identify VOI in a new image.
In the next step, the ROI will be resampled to decrease the effects of partial voluming. The Advanced tab of Step 2 allows to control how much the ROI will be resampled. Legacy resampling mode will perform resampling as in 3.4. Isotropic resampling mode allows to specify resampling constant (default 0.5, there will be two voxels in the resampled image for each input voxel of ROI)
- Step 3: Select tumor segmentation threshold
| Use threshold control slider to find the intensity that most closely approximates tumor volume. Thresholded volume is rendered interactively in the 3D viewer as you are adjusting the threshold value, and is also visualized as semi-transparent label in the image slice viewers.
Note, that currently ChangeTracker expects that the tissue you monitor corresponds to the high part of the image intensity distribution. In the cases when threshold is not effective in segmenting the structure of interest, Advanced tab allows to prescribe the segmentation label image directly, instead of using threshold. |
- Step 4: Define metric
| We provide two metrics to quantify tumor progression: intensity-based and deformation-based (see details in this paper). Choose the metric(s) you would like to use.
In some cases, the automatic registration functionality in ChangeTracker may not be able to accurately register your data. If this happens, you can use the Advanced tab to register your data, place Scan2 under the transform, and select "I have a transform that aligns my data" option. If your data is already aligned, choose "Do not align my data". |
- Analysis/Results
| Results are reported as the change in tumor volume, separately for growth and shrinkage component. The quantitative results are reported in voxels and mm^3. Sensitivity of the analysis can be controlled by choosing Sensitive, Moderate, or Robust analysis approach (Robust being the most conservative). As you change the sensitivity, visualization and quantitative data are updated accordingly. Growth is shown in purple, and shrinkage -- in green color.
The visualization of the analysis results includes the following components upon the completion of analysis:
You can choose to display the original sampling grid, and view the coronal slice of the subject using the wizard controls. ChangeTracker produces a number of new volume images with the temporary and analysis image data, as explained below:
The following volumes will be created only when Intensity analysis is requested:
The following volumes will be created only when Deformation analysis is requested:
|
Development
Notes from the Developer(s)
Dependencies
ChangeTracker depends on the following modules: Volumes, Rigid Registration, DiffeomorphicDemons
|
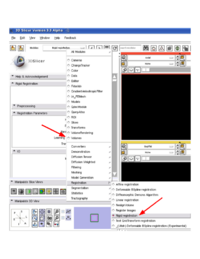
Volumes module is required for the general tasks of new volume creation etc. This module should always be available in your Slicer, but can be turned off in the Slicer Application Settings. Make sure it is available. ChangeTracker is using Rigid Registration module through the CommandLineModule shared object invocation. Note, that there are two distinct rigid registration modules in Slicer, which have identical functionality: "Linear registration" and "Rigid registration". Both of these modules should be available in your build, but "Rigid registration" *must* be available for ChangeTracker to function properly. You can verify the availability of the module manually by looking at the list of modules in the registration category. |
Tests
The following tests verify some of the functionality of the module on the Slicer dashboard.
vtkChangeTrackerGUITest.cxx: exercise basic functionality of the GUI classes
vtkMRMLChangeTrackerNodeTest.cxx: exercise basic functionality of the MRML node
ChangeTrackerCL_Help: verify correct execution of the command line module without any action
ChangeTrackerCL_TestFull_Intensity: command line module to exercise some of the functionality in ChangeTracker logic
Known bugs
This module isn't fully integrated with MRML yet. MRML scene snapshots and restores are not yet supported. Please save your work using the file save dialogs in the user interface.
Follow this link to the Slicer3 bug tracker.
Usability issues
| ChangeTracker is using rigid registration module to automatically align the input images and selected volumes of interest. It is possible, that rigid registration can fail to align your data. If this happens, you will see error message in the pop-up box, as shown to the right.
You can try to solve this problem by manually registering your data prior to using it with ChangeTracker, placing Scan2 under the transform in the MRML hierarchy, and choosing "I have a transform that aligns my data" in the Advanced tab of Step 4. Follow this link to the Slicer3 bug tracker to report any usability issues. Please select the usability issue category when browsing or contributing. |
Source code & documentation
Follow this link to the ChangeTracker source code in ViewVC.
Documentation generated by doxygen.
More Information
Acknowledgment
ChangeTracker development has been funded by Brain Science Foundation
References
- E.Konukoglu, W.M.Wells, S.Novellas, N.Ayache, R.Kikinis, P.M.Black, K.M.Pohl. Monitoring Slowly Evolving Tumors. Proc. of 5th IEEE International Symposium on Biomedical Imaging: From Nano to Macro 2008, pp.812-815 link


