Documentation:Nightly:Registration:RegistrationLibrary:RegLib C15
Contents
Slicer Registration Library Case #15: Align brain MRI along anatomical AC-PC line
Input

|

|

|
| target POS MRI |
moving image MRI |
Description
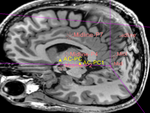
This example shows the use of the AC-PC alignment volume. Aligning a brain image along the anterior- (AC) posterior commissure is a standard procedure in many analyses.
Approach: we create two sets of Annotations containing fiducial points that define the inter-hemispheral midline and the anterior and posterior commissure, respectively. This is then used as input to the ACPC module.
Modules used
Download (from NAMIC MIDAS)
Why 2 sets of files? The "input data" mrb includes only the unregistered data to try the method yourself from start to finish. The full dataset includes intermediate files and results (transforms, resampled images etc.). If you use the full dataset we recommend to choose different names for the images/results you create yourself to distinguish the old data from the new one you generated yourself.
- RegLib_C15.mrb: input data only (incl. fiducials), use this to run the tutorial from the start (Slicer mrb file. 22 MB).
- RegLib_C15_full.mrb: includes raw data + all solutions and intermediate files, use to browse/verify (Slicer mrb file. 22 MB).
Keywords
MRI, brain, head, AC-PC, landmark, registration
Video Screencasts
Procedure
- Create Fiducial Landmarks: open the Annotations module. We will create 2 annotation lists, one containing the anterior and posterior commissure, and one containing midline points.
- in a slice view, locate the anterior commissure (sagittal view recommended).
- Click on the Fiducial placement button in the toolbar. This declares the next left mouseclick to be a fiducial selection.
- click (left mouse button) in the image to place the fiducial. You should see an annotation being placed at the location.
- Locate the prosterior commissure and repeat fiducial placement above.
- In the Fiducial module, make sure the two created landmarks are in the same hierarchy. Rename the hierarchy "AC-PC" or similar
- Create a new fiducial hierarchy. Rename to "Midline"
- in the axial view, place 4-5 landmarks along the interhemispheral midline (same as above)
- n the Fiducial module, make sure the above created midline landmarks are all in the same '"Midline" hierarchy.
- The "AC-PC" hierarchy should only contain 2 landmarks for AC and PC, respectively
- The "Midline hierarchy should only contain 4 or more landmarks defining the interhemispheral midline
- Calculate the transform: Open the ACPC Transform module
- ACPC Line: select the fiducial list created above, named "AC-PC"
- Midline: select the fiducial list created above, named "Midline"
- Output transform: create new & rename: rename to "Xf1_ACPC" or similar
- click: Apply; runtime ~ 1 second.
- Apply the transform: We have now computed the registration transform, but we still need to apply this transform to the MRI image. The preferred way to do this is without resampling the image, i.e. by applying the linear transform to the spatial orientation information in the image header.
- Go to the Data module
- Find the original image, labeled as "MRI"
- drag the "MRI" node onto the transform node, labeled "Xf1_ACPC". You should see a small + appear next to the transform node. When you click it you should see the image now residing inside the transform. If you have the Slice views, it should show you now the aligned position of the MRI image.
- apply the transform: right click on the "MRI" image and from the pop-up menu, select Harden Transform. This will apply the transform without resampling and move it back to the main hierarchy level.
- double click on the MRI node and rename it to something like "MRI_ACPCAligned" or similar, to document that this image has now a transform applied to it.
- Click on the Save icon and save the new image under a new name.
- Go to the Data module
Registration Results
 |
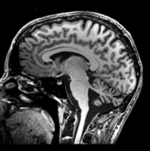
MRI and PET after registration (click to enlarge) |