Home < Modules:Endoscopy-Documentation-3.6Return to Slicer 3.6 Documentation
Endoscopy Module
Endoscopy
 Example Endoscopy Session for virtual colonoscopy (CT colonography). |
General Information
Module Type & Category
Type: Interactive, Python Scripted
Category: Endoscopy
Authors, Collaborators & Contact
- Steve Pieper, Isomics
- Ron Kikinis, BWH
- Contact: Steve Pieper, pieper at bwh
Module Description
Allows interactive flythrough animation based on fiducial list.
Usage
Use Cases, Examples
- CropVolume allows to extract a parallelepiped-shaped subvolume, located arbitrarily within a larger 3D volume. The module allows to control the spacing of the resulting volume, and gives control over the interpolation mode.
- The module is particularly useful in cases when the amount of computation or its complexity can be reduced by limiting the processing to the region of interest.
- The subvolume produced by the module is located precisely in the space of the original image.
Tutorials
CropVolume (at the time, ExtractSubvolumeROI) is used in the following tutorial: Centerline Extraction of Coronary Arteries in 3D Slicer using VMTK based Tools (winner of the SLC AHM 2010 tutorial contest). Follow the link for the tutorial slides and test data.
Quick Tour of Features and Use
- Input/initialization parameters panel:
- Input volume defines the input image from which you need to crop a subvolume
- ROI is a Region of Interest (see the ROI module documentation), which can be defined outside CropVolume, or by creating new MRMLROINode from the selector menu. The ROI can be adjusted using the widget handles in 3D view panel.
- ROI visibility allows to turn the visibility of the 3D widget on or off in the 3D view panel.
- Output volume is the volume node where the result of ROI extraction will be stored. Note, that the output volume cannot be identical to the input volume. The module will give you an error if this is the case.
- Input spacing scaling constant is the coefficient used to determine the spacing of the output volume. The output spacing is defined by multiplying the input spacing in each dimension by the user-specified coefficient. For example, if the input spacing is 1x1x1.4, and the scaling coefficient is 0.5, the output volume will have spacing 0.5x0.5x0.7, effectively doubling the resolution of the output image.
- Isotropic voxel size if this checkbox is selected, the output image will have isotropic spacing, with the voxel size of the output image in each dimension equal to the smallest voxel dimension of the input image multiplied by the scaling constant.
- Interpolation type allows to select between Nearest Neighbor, Linear or Cubic interpolators. For subvolumes being extracted from a label volume, you should use Nearest Neighbor interpolator. Otherwise Cubic is the preferred choice. Linear interpolator requires less computation, which may be important for very large ROIs.
- Do ROI resample initiates the subvolume extraction based on the inputs and parameters.
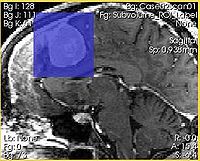
- Viewing panel: Size and location of the ROI can be modified using one of the two methods. First, this can be done in 3D View by moving the colored handles of the ROI widget. Second, the ROI can be adjusted in the slice views. Right mouse button click adjusts the bounds of the ROI. Left mouse button click moves the center of ROI to be the point where the click was made.
- The input volume and input ROI are both allowed to be under linear transform. This allows to extract a parallelepiped shaped ROI, which is arbitrarily oriented within the input volume using these steps:
- Create a new Transform in the MRML Tree (Data module), or in the Transforms module
- Drag the input ROI node under the created transform in the MRML tree (Data module)
- Adjust the rotation of the ROI from the Transforms module
- Return to CropVolume, use the ROI from above to extract the subvolume
Upon completion of the resampling operation, the input volume is set as the Background image volume, and the extracted resampled ROI is set as the Foreground image.
|
|
|
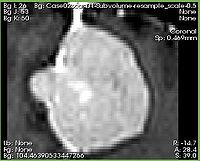
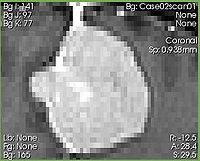
 Cropped subvolume with scaling constant 0.5 -- note the difference in the image spacing |
|
|
 Intersection of the ROI with the slice is shown in semi-transparent blue |
|
Development
Notes from the Developer
This module wraps the functionality of VTK class vtkImageReslice
Dependencies
ROI Module and Volumes Module.
Tests
Not available at this time.
Known bugs
Follow this link to the Slicer3 bug tracker.
Usability issues
Follow this link to the Slicer3 bug tracker. Please select the usability issue category when browsing or contributing.
Source code & documentation
Source code can accessed here
Links to documentation generated by doxygen.
More Information
Acknowledgment
Supported by Brain Science Foundation.
References


