Difference between revisions of "Documentation:Nightly:Registration:RegistrationLibrary:RegLib C49"
| Line 25: | Line 25: | ||
== Modules used == | == Modules used == | ||
| − | *[[Documentation/Nightly/Modules/BRAINS| '' | + | *[[Documentation/Nightly/Modules/BRAINSFit|''General Registration (BRAINS)'' module]] |
| + | *[[Documentation/Nightly/Modules/BRAINSResample|''Resample (BRAINS)'' module]] | ||
| + | *[[Documentation/Nightly/Modules/Editor|''Editor'' module]] (for mask generation/editing) | ||
== Download (from NAMIC MIDAS) == | == Download (from NAMIC MIDAS) == | ||
<small>''Why 2 sets of files? The "input data" mrb includes only the unregistered data to try the method yourself from start to finish. The full dataset includes intermediate files and results (transforms, resampled images etc.). If you use the full dataset we recommend to choose different names for the images/results you create yourself to distinguish the old data from the new one you generated yourself. ''</small> | <small>''Why 2 sets of files? The "input data" mrb includes only the unregistered data to try the method yourself from start to finish. The full dataset includes intermediate files and results (transforms, resampled images etc.). If you use the full dataset we recommend to choose different names for the images/results you create yourself to distinguish the old data from the new one you generated yourself. ''</small> | ||
| − | *[http://slicer.kitware.com/midas3/download/?items=118088 ''' | + | *[http://slicer.kitware.com/midas3/download/?items=118088 '''RegLib_C49.mrb''': input data only, use this to run the tutorial from the start <small>(Slicer mrb file. 50 MB). </small>] |
| − | *[http://slicer.kitware.com/midas3/download/?items=118087 ''' | + | *[http://slicer.kitware.com/midas3/download/?items=118087 '''RegLib_C49_full.mrb''': includes raw data + all solutions and intermediate files, use to browse/verify <small>(Slicer mrb file. 82 MB). </small>] |
== Keywords == | == Keywords == | ||
Revision as of 16:45, 18 September 2013
Home < Documentation:Nightly:Registration:RegistrationLibrary:RegLib C49Contents
Slicer Registration Library Case #49: Pediatric Brain DTI
Input
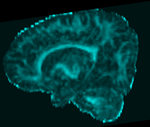
| fixed image/target DTI (FA) |
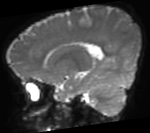
fixed image/target DTI (B0) |
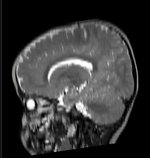
moving image T2 MRI |
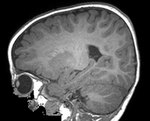
moving image T1 MRI |
Description
Goal is to align the structural T1 and T2 images with the DTI. Particularly the T1, which is associated with additional atlas/segmentation data (not shown). The DTI has strong distortions typical for EPI acquisitions.
Approach: Because the T2 matches the B0 contrast better than the T1, we will use the T2 as registration target. We will then register the T1 to the T2 and finally to the B0. Since the DTI contains strong distortions, a nonrigid registration is necessary. Workflow:
- affine register T2-B0
- BSpline register T2-B0, using the above affine as starting point
- affine register T1-T2. Apply transform without resampling
- resample T1 with nonrigid transform obtained for the T2.
Modules used
- General Registration (BRAINS) module
- Resample (BRAINS) module
- Editor module (for mask generation/editing)
Download (from NAMIC MIDAS)
Why 2 sets of files? The "input data" mrb includes only the unregistered data to try the method yourself from start to finish. The full dataset includes intermediate files and results (transforms, resampled images etc.). If you use the full dataset we recommend to choose different names for the images/results you create yourself to distinguish the old data from the new one you generated yourself.
- RegLib_C49.mrb: input data only, use this to run the tutorial from the start (Slicer mrb file. 50 MB).
- RegLib_C49_full.mrb: includes raw data + all solutions and intermediate files, use to browse/verify (Slicer mrb file. 82 MB).
Keywords
MRI, CT, abdominal, image-guided surgery, interventional radiology, intra-subject, fiducial-based registration
Video Screencasts
Procedure
- Create CT fiducial list:: see also movie above
- load the two datasets. Adjust brightness & contrast if necessary. Place the CT scan in the background and center the views.
- Open the Markups module
- List: create and rename new list. Name to "fiducials_CT" or similar
- locate anatomical landmarks that is common to both images and readily identifiable. Smaller and distinctly shaped structures will likely carry less of a selection error than large uniform ones. It is also advisable to select fiducials from or near the region of interest.
- switch the mouse function to fiducial mode, by clicking the Fiducial button in the toolbar.

- place a fiducial marker via left mouse-click
- you should see the fiducial appear in the list on the left. Double click the name field and rename the point with a descriptive name that will let you distinguish it from others. The fiducials we generate in the list must be in the same order in both lists (MR and CT), so it is important we can distinguish which fiducial is which.
- select 2-3 additional fiducials. The more fiducials we have, the more robust the registration. However, if you feel that the uncertainty/accuracy of a new landmark is significantly above the others, you may do better leaving it out and trying with a smaller set. For a rigid registration at least 3 fiducials are needed. Another advantage of having more than necessary, is that you can later easily test/revise the registration by removing individual points and recalculating the transform. Because the calculation is instant, you can see immediately if the match improves by leaving individual markers out. More on this in the discussion below.
- open the Advanced tab and change the colors for this list (both selected and unselected). This will help you keep the two lists apart, i.e. distingush the CT list from the MR list
- switch the MR image into the backrgound and recenter the views.
- Create MRI fiducial list: see also movie above
- List: create and rename new list. Name to "fiducials_MRI" or similar
- repeat the selection of fiducials as above.
- in the Advanced tab, you can reshuffle the order of fiducials in the list. Important: remember that the fiducials in the two lists must be in the same order, i.e. the same anatomical loci must appear in both lists in the same order. If not you can use the shuffle buttons in the Advanced tab to rearrange.
- Save both lists. This will create ".csv" with fiducial names and coordinates
- Fiducial Registration:
- go to the Documentation/Nightly/Modules/Fiducial Registration ''Fiducial Registration'' module (menu: Registration / Specialized)
- Fixed Landmarks: select "Fiducials_CT"
- Moving Landmarks: select "Fiducials_MR"
- Save transform: select "Create and rename new linear transform, rename to "FiducialReg_Rigid" or similar.
- click Apply. note that the calculation is instantaneous, but you will not see an effect on the image just yet.
- place the CT image in the background and center. Place the MR image in the foreground and set the fade slider halfway so you can see both images superimposed
- Go to the Documentation/Nightly/Modules/Data ''Data'' module
- you should see the newly created transform node in the MRML tree. Locate the MR image and drag its node onto the transform node (release the left mouse button when a box appears around the transform node). The MR image is placed inside the new transform. You should see the views update immediately.
- also drag the "fiducially_MR" node into the transform. Your data hierarchy should look similar to the image on the right.
- use the fade slider to judge the alignment.
- the 3D viewer will be very helpful here to assess the alignment of the fiducial pairs in space.
- optional: Revise registration / sensitivity test
- if you have more than the minimal (3) fiducial points available, you can test the effects of individual landmarks by recalculating the transform with individual points deleted.
- make sure you have both fiducial lists saved beforehand
- from the 3D or 3D views, identify a fiducial pair that shows the largest residual misalignment after registration (make sure the MR fiducial list is also within the transform)
- go back to the Markups module and delete that fiducial from both lists.
- make sure you have the CT in the background and the MR in the foreground, the fade slider set to halfway and the MR image inside the result transform
- return to the Documentation/Nightly/Modules/Fiducial Registration ''Fiducial Registration'' module (menu: Registration / Specialized) and rerun the registration, choosing the same transform result name.
- click apply. This will calculate a new transform with the updated fiducial list and replace the existing transform. You should see the difference immediately as the views update. You can use this to test if a registration can be improved by leaving out indiv. landmarks.
Registration Results
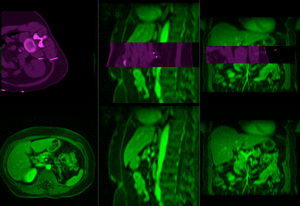 |
MR/CT before registration (click to enlarge) |
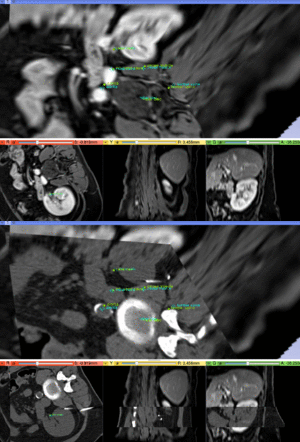 |
MR/CT after fiducial rigid alignment (click to enlarge) |
