Documentation/4.4/gif tutorial v3 3
From Slicer Wiki
Home < Documentation < 4.4 < gif tutorial v3 3
Tractography exploration of peritumoral white matter fibers
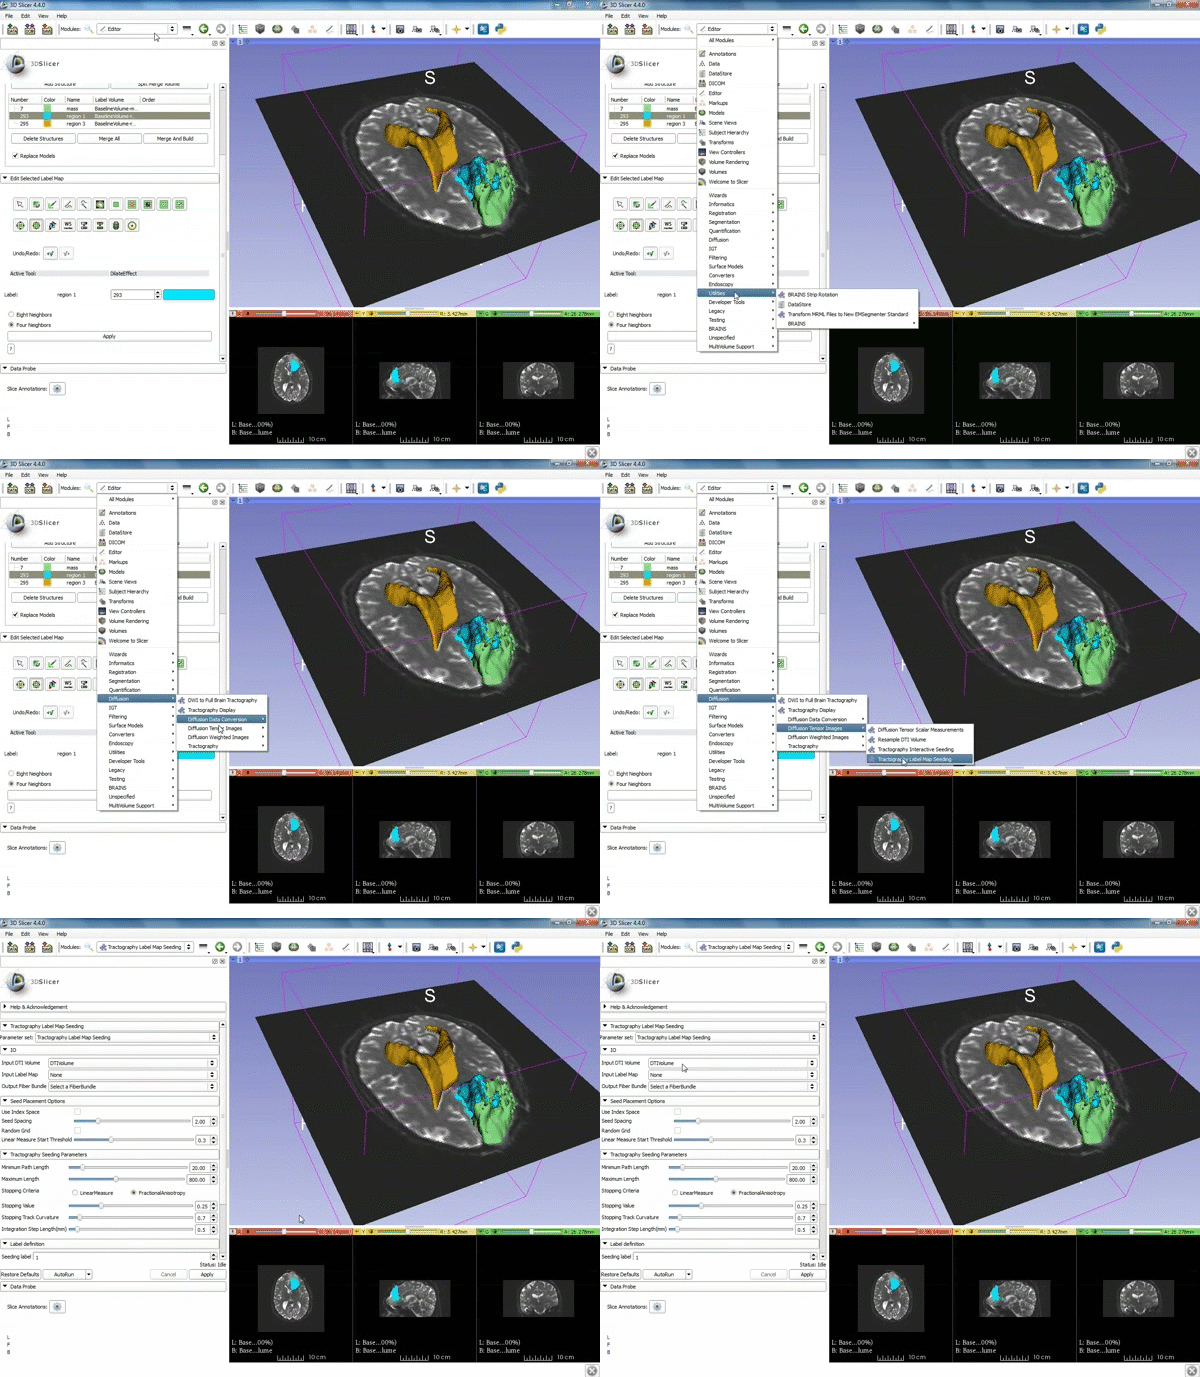
| 1. a) Make sure the cystic part is selected and visible in the 3 slice views. b) Click on the Dilate Effect tool then click on the cystic part of the tumor on the red slice view. | 2. Click on Apply 3 times to generate the peritumoral volume. |
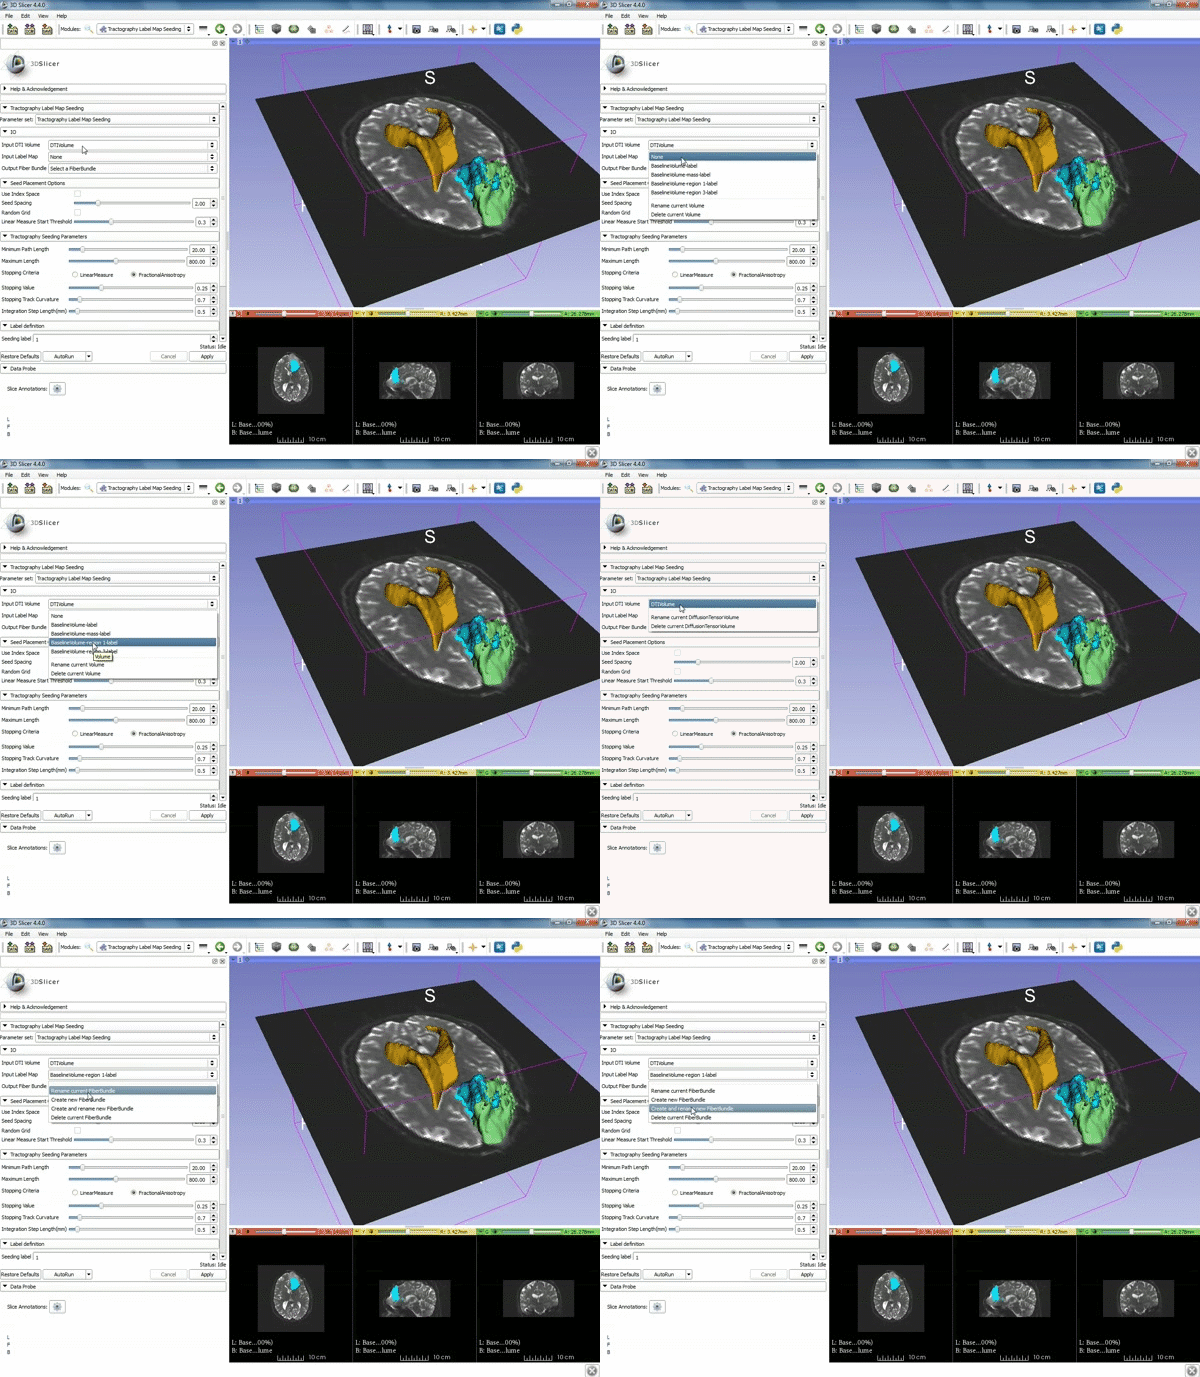
| 3. Select the module "Tractography Label Map Seeding" by clicking "Editor" at the top, then "Diffusion", then "Diffusion Tensor Imaging". | 4. Make sure that "DTI Volume" is selected for Input DTI Volume and "BaselineVolumeregion_1-label" is selected for Input Label Map. |
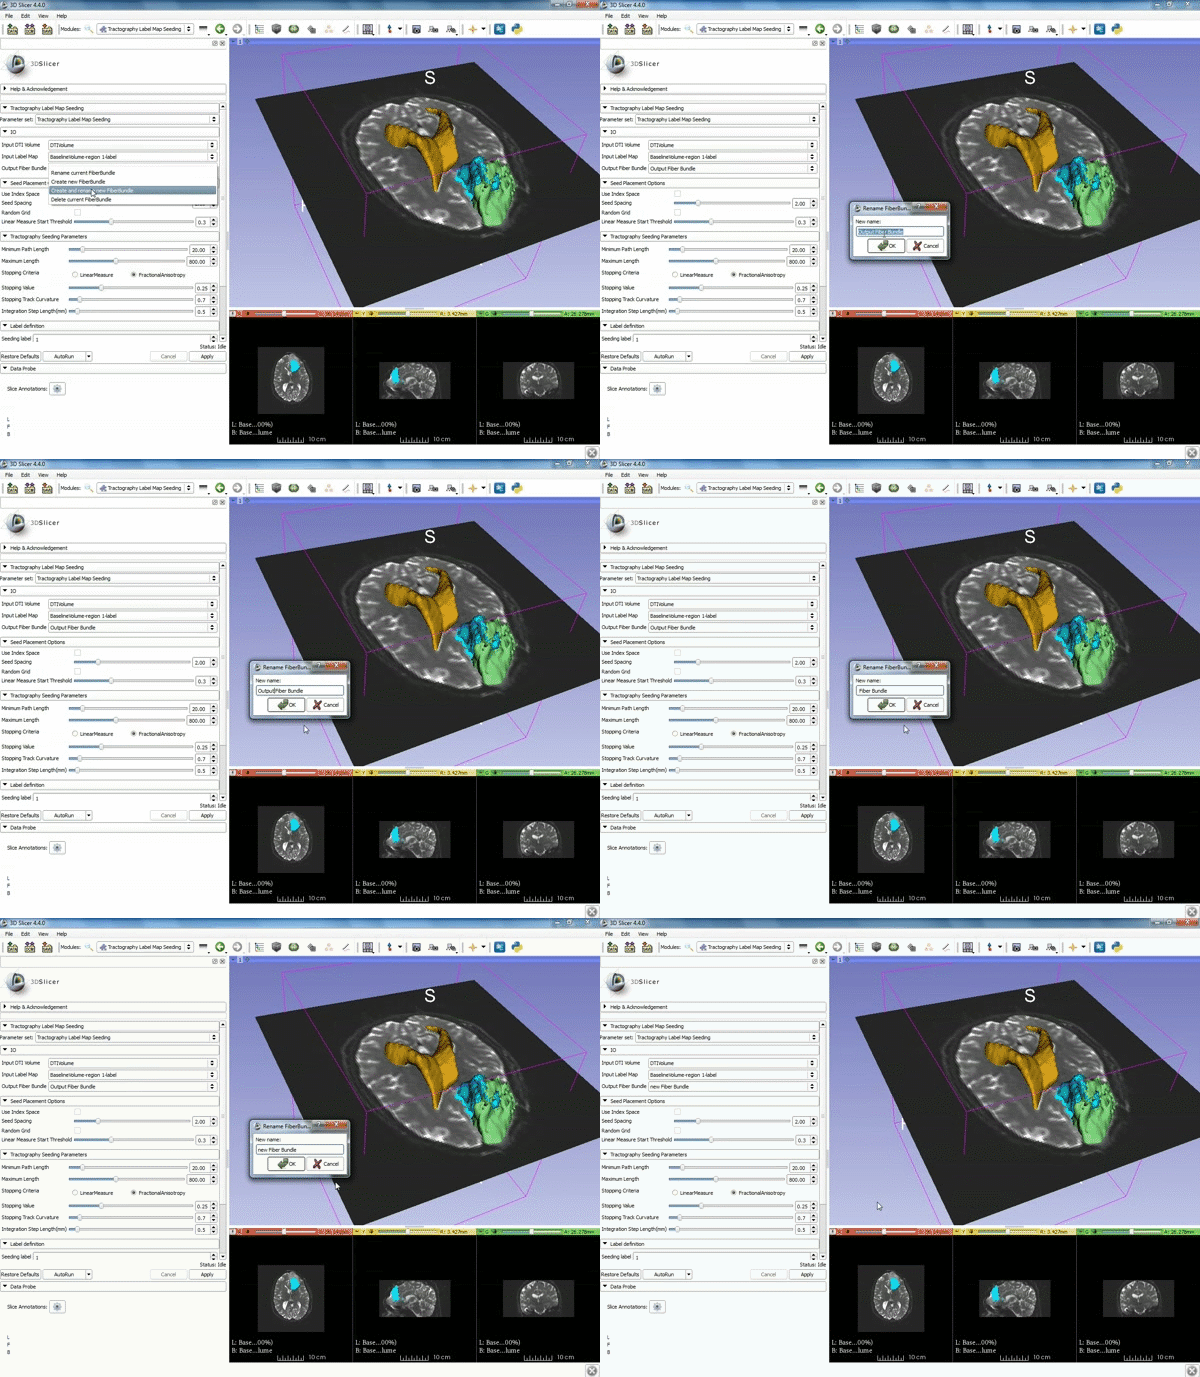
| 5. a) For Output Fiber Bundle select "Create and rename newFiberBundle". b)When the pop-up appears rename the fiber bundle to to "newFiberBundle". | 6. a) Under the Seed Placement Options: Check the Use Index Space. b) Under Tractography Seeding parameter set the stopping value to "0.15" and make sure for Stopping Criteria that "Fractional Anisotropy" is selected. |
| 7. Under Label Definition set the "Seeding Label" to 293, and Click on Apply. |


