Documentation:Nightly:Registration:RegistrationLibrary:RegLib C07
Contents
Slicer Registration Library Case #7: Prostate MRI Cancer Monitoring
Input

|

| |
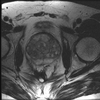
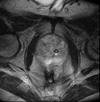
| exam 1: baseline MRI | exam 1: follow-up MRI |
Description
This is an example of serial/logitudinal imaging for change assessment in prostate cancer. We seek to register the follow-up scan to the baseline. Because of the strong changes in image field of view and contrast between the two exams, some additional work is necessary to obtain a good registration: 1) we will first apply a bias field correction to both images, to reduce regional intensity inhomogeneities caused during acquisition by the surface coils. 2) we will generate masks that include only the prostate and a bit of the surroundings. The field of view between the two images is different. When there is content that extends beyond the FOV and the amount differs in both images, leaving that clipped structure unmasked is problematic, particularly for highe DOF registrations, since the registration will try to match the "missing content" by expanding/stretching in that direction. Hence we mask out significant content present only in one image.
- see here for the Slicer 4.1 version of this case/tutorial (this version used cropping as alternative approach).
Modules used
- N4ITKBiasFieldCorrection (filter correcting for local intensity inhomogeneity)
- Editor
- General Registration (BRAINS)
Download (from NAMIC MIDAS)
Why 2 sets of files? The "input data" mrb includes only the unregistered data to try the method yourself from start to finish. The full dataset includes intermediate files and results (transforms, resampled images etc.). If you use the full dataset we recommend to choose different names for the images/results you create yourself to distinguish the old data from the new one you generated yourself.
- RegLib_C07.mrb: input data only, use this to run the tutorial from the start (Slicer mrb file. 8 MB).
- RegLib_C07_full.mrb: includes raw data + all solutions and intermediate files, use to browse/verify (Slicer mrb file. 27 MB).
Keywords
MRI, prostate, intra-subject, prostate cancer
Video Screencasts
- Movie/screencast showing importing, bias correction and affine registration
- Movie/screencast showing nonrigid registration without any masking
- Movie/screencast showing building the masks for registration
- Movie/screencast showing BSpline registration with the use of a mask
Procedure
- Bias Correction: Correct for local intensity inhomogeneities (screencast for this step)
- Open the N4ITK MRI Bias Correction module (under Filters menu)
- Input Image: "Day01_axial"
- Mask Image: none
- Output Volume: create & rename new: "Day01_axial_N4"
- Number of iterations: reduce to 90,60,40
- Shrink factor: reduce to 3
- leave all parameters at defaults
- Apply.
- repeat for the "Day42_axial" image. Same settings
- save intermediate results
- Open the N4ITK MRI Bias Correction module (under Filters menu)
- Affine pre-Registration: (screencast for this step)
- open the * General Registration (BRAINS) module
- Fixed Image Volume: "Day01_axial_N4"
- Moving Image Volume: "Day42_axial_N4"
- Output Settings:
- Slicer BSpline Transform": none
- Slicer Linear Transform: create & rename new transform, rename to "Xf1_Affine"
- Output Image Volume: none
- Initialize Transform Mode: select Use Moments Align.
- Registration Phases: check boxes for Rigid , Rigid+Scale and Affine
- Main Parameters : Number Of Samples: 200,000
- Leave all other settings at default
- Apply
- this should generate a first alignment. note that we need not generate an output volume, because this is an intermediate result, and the BRAINS registration tool will automatically place the moving volume inside the result transform.
- Place "Day01_axial_N4" in the background and "Day42_axial_N4" in the foreground. Use fade slider to evaluate the result. In the Data module, verify that the "Day42_axial_N4" image is sitting inside the transform "Xf1_Affine"
- open the * General Registration (BRAINS) module
- Build Masks: (screencast for this step)
- open the Editor module.
- Master Volume: "Day01_axial_N4"
- Merge Volume: create & rename new: "Day01_axial_mask" or similar
- Click Apply on the popup do confirm colormap selection (choice does not matter)
- click on the Brush Icon ("PaintEffect")
- Label: 1 (black)
- increase radius to ~ 40-50 mm.
- swicth to the "Red Slice Only" view. Navigate to an axial slice showing the prostate
- place brush circle over the prostate & left click to apply, then use arrow keys to move to the next slice.
- repeat for the"Day42_axial_N4" image
- save intermediate results
- open the Editor module.
- Nonrigid global Registration: (screencast for this step)
- open the General Registration (BRAINS) module
- Fixed Image Volume: "Day01_axial_N4"
- Moving Image Volume: "Day42_axial_N4"
- Initialization transform: "Xf1_Affine
- Initialize Transform Mode: de-select Use Moments Align, select None
- Output Settings:
- Slicer BSpline Transform": create & rename new transform, rename to "Xf2_BSpline"
- Slicer Linear Transform: none
- Output Image Volume: create & rename new transform, rename to "Day42_Xf2" or similar (this time we must request an output volume, since the nonrigid deformations cannot be visualized on the "fly.
- Registration Phases: uncheck rigid & affine boxes, check box for BSpline only
- Main Parameters:
- Number Of Samples: 300,000
- B-Spline Grid Size: 5,5,5
- Leave all other settings at default
- click: Apply
- open the General Registration (BRAINS) module
- Nonrigid masked Registration: (screencast for this step)
- open the General Registration (BRAINS) module
- Fixed Image Volume: "Day01_axial_N4"
- Moving Image Volume: "Day42_axial_N4"
- Initialization transform: "Xf1_Affine
- Initialize Transform Mode: de-select Use Moments Align, select None
- Output Settings:
- Slicer BSpline Transform": create & rename new transform, rename to "Xf3_BSpline_masked"
- Slicer Linear Transform: none
- Output Image Volume: create & rename new transform, rename to "Day42_Xf3" or similar
- Registration Phases: uncheck rigid & affine boxes, check box for BSpline only
- Main Parameters:
- Number Of Samples: 300,000
- B-Spline Grid Size: 7,7,5
- Mask Option: select ROI button
- ROI Masking input fixed: select "Day01_mask" generated in Step 2 above
- ROI Masking input moving: select "Day42_mask" generated above
- Leave all other settings at default
- click: Apply
- open the General Registration (BRAINS) module
=
Registration Results
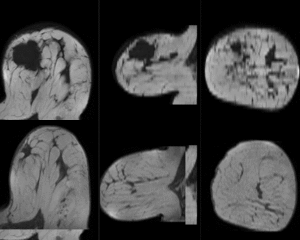
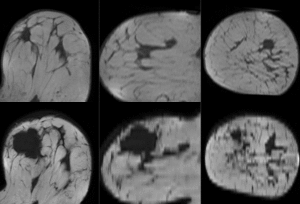
 unregistered
 after affine registration
 after nonrigid (BSpline) registration
Discussion: Registration Challenges
- soft tissue deformations during image acquisition cause large differences in appearance
- the large tumor recession represents a significant pre/post difference in image content that will influence unmasked intensity-driven registration, which becomes a problem for the non-rigid portion of registration, particularly at higher DOF, because the registration will try to "recreate" the tumor area from the postRx image in order to match the content.
- contrast enhancement and pathology and treatment changes cause additional differences in image content
- the surface coils used cause strong differences in intensity inhomogeneity.
- we have strongly anisotropic voxel sizes with much less through-plane resolution
- resolution and FOV change between the two scans
Discussion: Key Strategies
- because of the strong changes in shape and position, we break the problem down and register each breast separately.
- a bias-field correction on both images is necessary before registration
- to get better control over the process, we separate affine prior from final nonrigid alignment. The result of the affine registration is used as initialization for the nonrigid portion
- masking the tumor area is critical for a feasible solution, i.e. the tumor area in both scans should not participate actively in the registration, i.e. we create a mask that includes everything except the tumor area
