Documentation:Nightly:Registration:RegistrationLibrary:RegLib C20
From Slicer Wiki
Home < Documentation:Nightly:Registration:RegistrationLibrary:RegLib C20
Contents
Slicer Registration Library Case #20: Align PET/CT pair follow-up to baseline
Input
| fixed image/target baseline PET/CT |
moving image follow-up PET/CT |
Modules used
Download (from NAMIC MIDAS)
Keywords
PET/CT, full-body, intra-subject, nonrigid
Procedure
It is possible to perform both steps of affine and BSpline registration in a single pass within the General Registration (BRAINS) module, but to better show/judge progress we perform each separately and feed the results of one the the next step. Hence we first run an affine registration, then use that as starting point for a BSpline registration.
- Compute Affine Registration: open to the General Registration (BRAINS) module
- Input Images: Fixed Image Volume: CT_1
- Input Images: Moving Image Volume: CT_2
- Output Settings:
- Slicer Linear Transform: (create new transform, rename to: "Xf1_Affine")
- Output Image Volume: none (we need no resampled volume at this stage, only the transform)
- Initialization: none
- Initialize Transform Mode: switch to Off (there is sufficient overlap)
- Registration Phases: 'check Rigid, Rigid+Scale and Affine only
- Main Parameters:
- increase Number Of Samples to at least 200,000
- Leave all other settings at default
- click: Apply; runtime < 2 min.
- check the result
- Place "CT_1" in the background and "CT_2" in the foreground
- switch to the Data module, verify that the "CT_2" node is inside the newly created "Xf1_Affine" node. The registration module should do that automatically for you. You may see a small "+" next to the "Xf1_Affine" node, click on it to reveal the contents.
- fade between background and foreground to judge the alignment.
- Compute BSpline Registration: return to the General Registration (BRAINS) module
- Input Images: Fixed Image Volume: CT_1
- Input Images: Moving Image Volume: CT_2
- Output Settings:
- Slicer BSpline Transform: Create and rename new. Rename to "Xf2_BSpline"
- Slicer Linear Transform: set to none
- Output Image Volume: Create and rename new. Rename to "CT_2_Xf2" (we need a resampled volume to visualize the result. Nonrigid transforms cannot be visualized on the fly)
- Initialization: for the Initialization transform select the "Xf1_Affine" transform created above.
- Initialize Transform Mode: switch to Off
- Registration Phases: uncheck Rigid+Scale and Affine and select BSpline only
- Main Parameters:
- increase Number Of Samples to 300,000
- set B-Spline Grid Size to 11,11,7
- Leave all other settings at default
- click: Apply; runtime for this will be more than 1 minute, depending on CPU.
- check the result
- Place "CT_1" in the background and "CT_2_Xf2" in the foreground
- fade between background and foreground to judge the alignment.
- Apply transform to PET
Registration Results
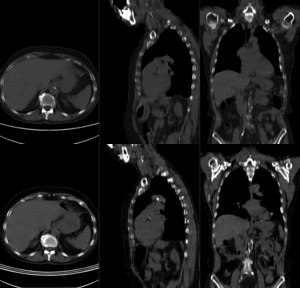 |before registration (click to enlarge) |before registration (click to enlarge)
|
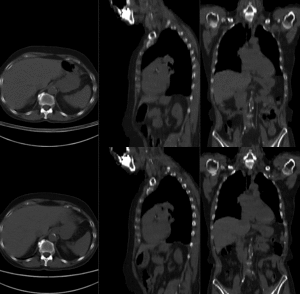 |after affine registration (click to enlarge) |after affine registration (click to enlarge)
|
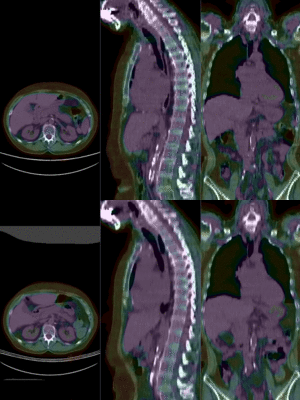 |BSpline deformation grid (click to enlarge) |BSpline deformation grid (click to enlarge)
|
