Documentation/Nightly/Extensions/VirtualFractureReconstruction
Introduction and Acknowledgements
|
Extension: Virtual Fracture Reconstruction
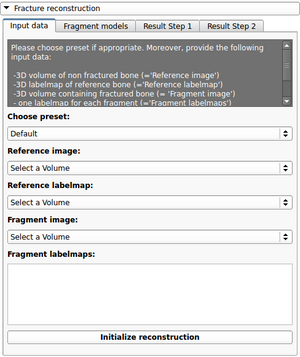
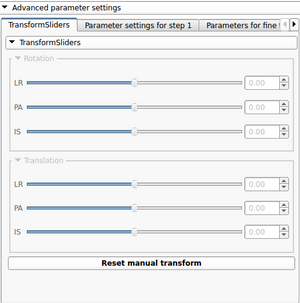
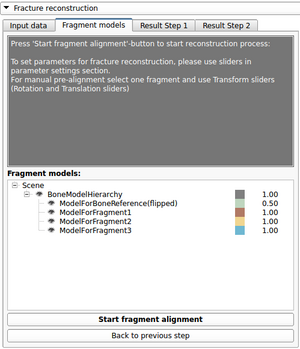
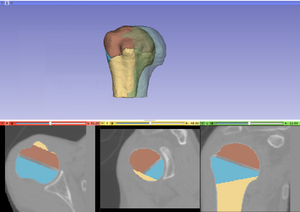
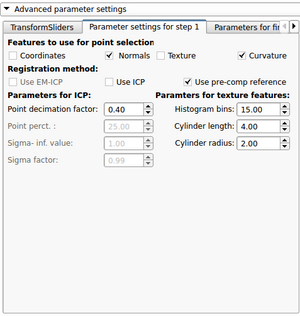
Module DescriptionThe reposition of bone fragments after a fracture, a process also referred to as fracture reduction, is a crucial task during the operative treatment of complex bone fractures. The repositioning of fracture fragments often requires a trial and error approach, which leads to a significant prolongation of the surgery and causes additional trauma to the fragments and the surrounding soft tissue. Wound healing failure, infections, or joint stiffness can be the consequence. Therefore, there is a clear trend towards the development of less invasive techniques to reconstruct complex fractures. In order to support this trend, software tools for calculating and visualizing the optimal way of repositioning fracture fragments based on the usage of segmented CT images as input data have been developed. In several studies, they have successfully demonstrated their potential to decrease operation times and increase reduction accuracy. However, existing software tools are often restricted to particular types of fractures and require a large amount of user interaction.Hence, the main objective of the proposed project is to overcome these limitations by developing an algorithmic pipeline that is calculating and visualizing the optimal way of repositioning fracture fragments with a minimal amount of user interaction and without restrictions to particular types of fractures. For this purpose, texture information coming from CT image, surface properties of the bone fragments as well as prior knowledge about the shape of the healthy (=non-fractured) bone are used for the reconstruction process. The module shall provide the possibility to perform a fully automated fracture reconstruction, but also to perform user guided reconstruction for very complex fractures with a large number of (small) bone fragments. Release NotesThe extension consists of two modules. One CLI Module and one loadable module. The CLI module is providing the algorithmic core functionality for the fragment alignment process, whereas the loadable module manages the automated reconstruction pipeline and integrates user interaction. Please note that this module is under active development, and is being made available for the purposes of beta testing and feedback evaluation! The functionality, GUI and workflows may change in the subsequent releases of the module. Moreover, parts of the original algorithm are written in CUDA. Due to some limitations for Slicer extensions, this CUDA code can currently not be provided in this extension. The CUDA part of the code is implementing a more flexible registration algorithm (EM-ICP), which can potentially lead to better reconstruction results. If you are interested in using this extended version of the code, please contact me. Use CasesThe extensions provides the possibility to reconstruction/realign fracture fragments and visualize the correct reconstruction of the fracture and switch between reconstructed and not reconstructed fragment position for individual fragments. In combination with a volume rendering a better/more detailed pre-surgical planning process shall be supported. Furthermore, the optimal reconstruction provided by the extension can a also act as a reference for post-operative quality assessment of the "real" reconstruction. TutorialsPanels and their useUsing the first tab of the loadable module the user should provide the following input data: -3D CT image(volume) of non fractured bone (='Reference image') After providing the input data the 'Initialize reconstruction'-button should be pressed in order to create 3D models of the labelmaps and initialize the reconstruction process If the user wants to provide a better manual interaction the transform sliders (from within the fracture reconstruction) module can be used. Better initialization will decrease the calculation times for the subsequent alignment process and potentially lead to better results. The "Reset manual transform" button to reset the postion of each fragment to the state prior to the manual interaction. After the initialization process is finished the second tab will be opened. The 2D and 3D views will be updated and a surface rendering of the fragments and reference bone will be provided. The user can change colors, opacity and visibility for each single fragment.
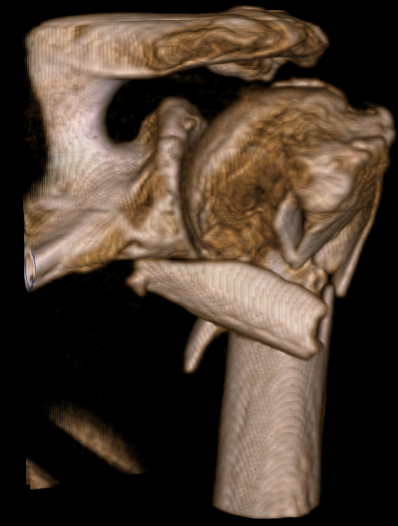
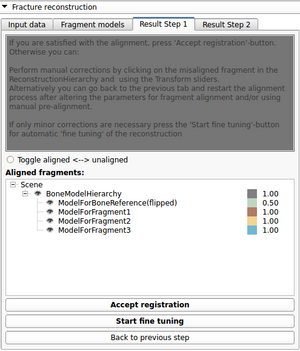
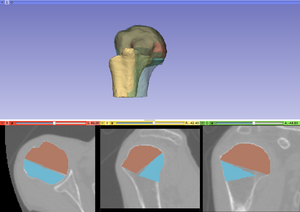
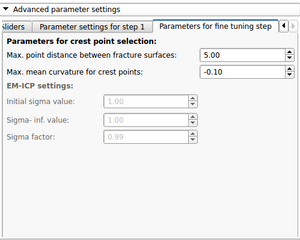
After the first step of the reconstruction is finished and user can inspect the intermediate result. 2D and 3D views will be update according to the calculated transformations. At this point the user, the following scenarios are possible: 1) Good registration - Accept registration without performing further registration (fine tuning part will be skipped). By pressing the "Start fine tuning" button the second part of the reconstruction process in which the fragments will be aligned against each other (without using the reference bone) will be started. The parameters for this step can be changed in the corresponding parameter tab ("Parameters for fine tuning") After the calculations for the fine tuning step are finished, the last tab will be opened ("Result step 2"). Again 2D and 3D views will be updated accordingly and the same 4 scenarios as in the previous step are possible.  Updated 2D and 3D views after final step of reconstruction. Note that the visible gaps are due to missing bone that has been "simulated" in this (toy) example. This view was generated using a wireframe representatioin of the fragments in combination with a volume rendering of CT dataset of the (healthy) reference bone
|
Similar Modules
References
- [http://???
Information for Developers
- Source code of the module: https://github.com/???
