Difference between revisions of "Modules:Volumes:Diffusion Editor-Documentation-3.6"
m (Text replacement - "\[http:\/\/www\.slicer\.org\/slicerWiki\/index\.php\/([^ ]+) ([^]]+)]" to "$2") |
|||
| Line 111: | Line 111: | ||
The Diffusion Editor uses the Tensor Estimation CLM (Command Line Module) of Slicer to compute tensors. | The Diffusion Editor uses the Tensor Estimation CLM (Command Line Module) of Slicer to compute tensors. | ||
* The module provides the linear-least-squares, non-linear-least squares and weighted-least-square method for the estimation. But the DiffusionEditor uses the linear-least-squares method by default, as it is the fastest and most robust. | * The module provides the linear-least-squares, non-linear-least squares and weighted-least-square method for the estimation. But the DiffusionEditor uses the linear-least-squares method by default, as it is the fastest and most robust. | ||
| − | * See [ | + | * See [[Slicer3:DTMRI#Tensor_Estimation_from_DWI_Module],|[http://wiki.na-mic.org/Wiki/index.php/NAMIC_Wiki:DTI:TeemExamples#tend_estim:_tensor_estimation]] for more information on the Tensor Estimation CLM. |
The testing frame provides just a small subset of DTI display options. For more detailed settings | The testing frame provides just a small subset of DTI display options. For more detailed settings | ||
| Line 119: | Line 119: | ||
==== Used Tractography Fiducial Seeding ==== | ==== Used Tractography Fiducial Seeding ==== | ||
The Diffusion Editor uses the Tractography Fiducial Seeding module of Slicer to compute tracts. | The Diffusion Editor uses the Tractography Fiducial Seeding module of Slicer to compute tracts. | ||
| − | * The Diffusion Editor uses the default parameters. To change tractography parameters select the modul: Tractography/Seeding/Fiducial Seeding [ | + | * The Diffusion Editor uses the default parameters. To change tractography parameters select the modul: Tractography/Seeding/Fiducial Seeding [[Slicer3:DTMRI#Tractography_Fiducial_Seeding_Module].|Changes there have an immediate impact for the tracts in the Diffusion Editor. |
| − | * For more detailed exploring of tracts use the Fiducial Seeding module or for display options select the module Tractography/DisplayLoadSave [http://www.slicer.org/slicerWiki/index.php/Slicer3:DTMRI#Tractography_Module]. | + | * For more detailed exploring of tracts use the Fiducial Seeding module or for display options select the module Tractography/DisplayLoadSave [http://www.slicer.org/slicerWiki/index.php/Slicer3:DTMRI#Tractography_Module]]. |
| − | * See [ | + | * See [[Slicer3:DTMRI#Tractography_Module|here]] for more information on the Tractography modules. |
===Dependencies=== | ===Dependencies=== | ||
| Line 149: | Line 149: | ||
** Future work: Adding different views of gradients/bValues. | ** Future work: Adding different views of gradients/bValues. | ||
* Checking gradients when one types new values in the textbox is slowly. Reason: SetDiffusionGradients of the vtkMRMLDiffusionWeightedVolumeNode seems to trigger many events. | * Checking gradients when one types new values in the textbox is slowly. Reason: SetDiffusionGradients of the vtkMRMLDiffusionWeightedVolumeNode seems to trigger many events. | ||
| − | ** Future work: Use [ | + | ** Future work: Use [[Slicer3:EventBroker|Eventbroker]] for performance analysis and if necessary turn off events. |
===Source code & documentation=== | ===Source code & documentation=== | ||
| Line 183: | Line 183: | ||
===References=== | ===References=== | ||
| − | [ | + | [[Image:Thesis_letter.pdf|Thesis]] |
| − | [ | + | [[Slicer3:DTMRI|DTMRI]] |
[http://wiki.na-mic.org/Wiki/index.php/NAMIC_Wiki:DTI:Nrrd_format Nrrd format] | [http://wiki.na-mic.org/Wiki/index.php/NAMIC_Wiki:DTI:Nrrd_format Nrrd format] | ||
[http://wiki.na-mic.org/Wiki/index.php/NAMIC_Wiki:DTI:DICOM_for_DWI_and_DTI DICOM for DWI and DTI] | [http://wiki.na-mic.org/Wiki/index.php/NAMIC_Wiki:DTI:DICOM_for_DWI_and_DTI DICOM for DWI and DTI] | ||
Revision as of 02:24, 27 November 2019
Home < Modules:Volumes:Diffusion Editor-Documentation-3.6Return to Slicer 3.6 Documentation
Module Name
Diffusion Editor
General Information
Module Type & Category
Type: Interactive
Category: Diffusion Imaging
Authors, Collaborators & Contact
- Author: Kerstin Kessel
- Contributor: Steve Pieper
- Contact: Steve Pieper, pieper at bwh.harvard.edu
Module Description
As the documentation of acquisition parameters in dicom data is not standardized, MRI scanners (Siemens, GE) handle gradients/bValues/measurement frame differently in their dicom headers. Because of that there is a big need to add/modify them manually.
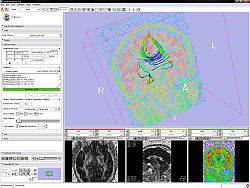
The Diffusion Editor is a 3D Slicer module, which allows modifying parameters (gradients, bValues, measurement frame) of DWI data and provides a quick way to interpret them. For that it estimates a tensor and shows glyphs and tracts for visual exploration.
Usage
Use Cases, Examples
This module is especially appropriate for these use cases:
For DWI
- Use Case 1: Edit gradients manually or load existing gradients from file (.txt or .nhdr).
- Use Case 2: Edit the measurement frame manually or simply rotate/swap/invert columns by selecting them.
- Use Case 3: Test the parameters by estimating a tensor and displaying glyphs and tracts.
For DTI
- Use Case 2: Edit the measurement frame as described above.
- Use Case 3: Test the parameters by displaying glyphs and tracts.
Tutorials
Preparation
- Download Slicer. The most recent stable Slicer version can be found here. Or load Slicer's latest snapshot.
- You can also use SVN to checkout the trunk of the current version of Slicer. See here for more instructions on how to build Slicer.
- Download example data: DiffusionEditor_ExampleData.zip and unzip it.
To start a tutorial video simply click on the link in the table.
| title | short description |
|---|---|
| Load DICOM | Load a DWI dicom data set in Slicer. |
| Edit gradients | Change gradients manually and load them from a file. Save your changes afterwards. |
| Edit measurement frame | Change the measurement frame by swapping and inverting. Save your changes afterwards. |
| Testing | Run tensor estimation and show glyphs and tracts;
Run second estimation with 90°rotation and switch between both tensors and see the impact of that change. |
Quick Tour of Features and Use
NOTE: You lose all previous changes when a new active volume is loaded or selected.
|
Development
Notes from the Developer(s)
Measurement Frame
The measurement frame of all DWI is always displayed in the RAS space. That's because Slicer stores all internal coordinates in RAS. If you save changes in a new .nhdr file the measurement frame will always be in RAS.
Used Tensor Estimation
The Diffusion Editor uses the Tensor Estimation CLM (Command Line Module) of Slicer to compute tensors.
- The module provides the linear-least-squares, non-linear-least squares and weighted-least-square method for the estimation. But the DiffusionEditor uses the linear-least-squares method by default, as it is the fastest and most robust.
- See [[Slicer3:DTMRI#Tensor_Estimation_from_DWI_Module],|[1]] for more information on the Tensor Estimation CLM.
The testing frame provides just a small subset of DTI display options. For more detailed settings
- load the DTI as the active volume in the volumes modul
- go to the display frame and adjust parameters.
Used Tractography Fiducial Seeding
The Diffusion Editor uses the Tractography Fiducial Seeding module of Slicer to compute tracts.
- The Diffusion Editor uses the default parameters. To change tractography parameters select the modul: Tractography/Seeding/Fiducial Seeding [[Slicer3:DTMRI#Tractography_Fiducial_Seeding_Module].|Changes there have an immediate impact for the tracts in the Diffusion Editor.
- For more detailed exploring of tracts use the Fiducial Seeding module or for display options select the module Tractography/DisplayLoadSave [2]].
- See here for more information on the Tractography modules.
Dependencies
No other modules or packages are required for this module's use.
Tests
On the Dashboard, these tests verify that the module is working on various platforms:
- DiffusionEditor_GradientsTest.tcl
- DiffusionEditorTensorTest.tcl
- DiffusionEditorTest.tcl
- DiffusionEditor_GradientsTest.tcl
Known bugs
Follow this link to the Slicer3 bug tracker.
Usability issues
Follow this link to the Slicer3 bug tracker. Please select the usability issue category when browsing or contributing.
- Changing the measurement frame of a DTI has no impact. The tensor is not estimated again.
- Future work: Adding new rotation filter for tensors (contributed by Raul San Jose)
- Multiple bValues are not displayed. Currently to describe acquisitions with different b-values the magnitudes of the gradients are changed. See the nrrd format page about describing DWIs with different b-values.
- Future work: Adding different views of gradients/bValues.
- Checking gradients when one types new values in the textbox is slowly. Reason: SetDiffusionGradients of the vtkMRMLDiffusionWeightedVolumeNode seems to trigger many events.
- Future work: Use Eventbroker for performance analysis and if necessary turn off events.
Source code & documentation
Links to the module's source code:
Source code:
Doxygen documentation:
More Information
Acknowledgment
This research project was part of a Master thesis (Diplomarbeit) in cooperation of the faculty of Medical Informatics, University of Heidelberg/Germany and the Surgical Planning Lab. It was supported by a grant of the Lions Club Heilbronn/Franken.


