Difference between revisions of "Documentation:Nightly:Registration:RegistrationLibrary:RegLib C03"
| Line 3: | Line 3: | ||
== Input == | == Input == | ||
{| style="color:#bbbbbb; " cellpadding="10" cellspacing="0" border="0" | {| style="color:#bbbbbb; " cellpadding="10" cellspacing="0" border="0" | ||
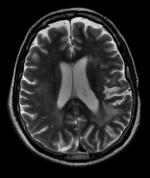
| − | |[[Image:RegLib_C03_thumb1.png|150px| | + | |[[Image:RegLib_C03_thumb1.png|150px|left|this is the fixed T2 reference image. All images are aligned into this space]] |
| − | |[[Image:RegArrow_NonRigid.png|100px| | + | |[[Image:RegArrow_NonRigid.png|100px|left]] |
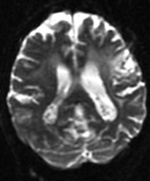
| − | |[[Image:RegLib_C03_thumb2.png|150px| | + | |[[Image:RegLib_C03_thumb2.png|150px|left|this is the DTI Baseline scan, to be registered with the T2]] |
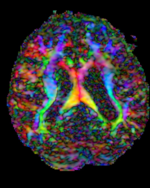
| − | |[[Image:RegLib_C03_thumb3.png|150px| | + | |[[Image:RegLib_C03_thumb3.png|150px|left|this is the DTI tensor image, in the same orientation as the DTI Baseline]] |
|- | |- | ||
|fixed image 1/target<br>T2 | |fixed image 1/target<br>T2 | ||
Revision as of 15:30, 19 August 2013
Home < Documentation:Nightly:Registration:RegistrationLibrary:RegLib C03Slicer Registration Library Case #3: Diffusion Weighted Image Volume: align with structural reference MRI
Input
| fixed image 1/target T2 |
moving image 2a DTI baseline |
moving image 2b DTI tensor |
Objective / Background
Goal is to align the DTI image with the structural reference T2 scan that provides accuracte anatomical reference.
Modules used
Alternate Versions
- this example covers the most basic form of directly registering a DTI + baseline to a T2. There is another (more advanced) version that show how to address additional issues of a strong initial rotation and strong voxel-anisotropy for the raw DWI image acquired:
- for the Slicer 4.1 version of this case see here
- for the Slicer 3.6.3 version of this case see here
Download (from NAMIC MIDAS)
Why 2 sets of files? The "input data" mrb includes only the unregistered data to try the method yourself from start to finish. The full dataset includes intermediate files and results (transforms, resampled images etc.). If you use the full dataset we recommend to choose different names for the images/results you create yourself to distinguish the old data from the new one you generated yourself.
- RegLib_C03.mrb: input data only, use this to run the tutorial from the start (Slicer mrb file. 50 MB).
- RegLib_C03_full.mrb: includes raw data + all solutions and intermediate files, use to browse/verify (Slicer mrb file. 108 MB).
Keywords
MRI, brain, head, intra-subject, DTI, DWI
Video Screencasts
Procedure
This assumes you have the following: 1) a T2 reference image, 2) a DTI baseline image and 3) the DTI volume (both obtained from the Diffusion Tensor Estimation module). If you do not have a baseline image, generate a scalar Trace image from the DTI, using the Diffusion Tensor Scalar Measurements module:
- Compute Registration: open the General Registration (BRAINS) module
- Input Images: Fixed Image Volume: T2
- 'Input Images: Moving Image Volume: DTI_baseline
- Output Settings:
- Slicer BSpline Transform (create new transform, rename to: "Xf1_DTbase-T2_BSpline")
- Slicer Linear Transform none
- Output Image Volume (create new volume, rename to: "DTIbaseline_Xf1"
- Registration Phases: select/check Rigid , Rigid+Scale, Affine, BSpline
- Main Parameters:
- increase Number Of Samples to 300,000
- set B-Spline Grid Size to 7,7,5 (we have lower resolution in the IS-direction (z), hence we set a smaller (5) grid size there)
- Leave all other settings at default
- click: Apply; runtime < 1 min.
- Resample DTI: We have now computed the registration transform, but the output volume produced above is a registered version of the baseline, which we need for validation only. To get the actual DTI registered we now apply this transform to the tensor image.
- Open the Resample DTI Volume module (found under: All Modules) (Do not resample a tensor image with other modules, this one must be used to correctly transform the tensor data)
- Input Volume: select DTI
- Output Volume: select create new Diffusion Tensor Volume,and rename it to DTI_Xf1
- Reference Volume: select T2
- Transform Parameters: select transform node "Xf1_DTI-T2_BSpline", for Deformation Field: none ; check the displacement checkbox
- Leave all other settings at defaults
- Click Apply; runtime ~ 2 min.
- set T2 as background and new DTI_Xf1 volume as foreground
- fade between back- and foreground to see DTI overlay onto the T2 image. Note that you can also fade via holding the OPTION+CMD keys (mac) + dragging left mouse.
- Open the Resample DTI Volume module (found under: All Modules) (Do not resample a tensor image with other modules, this one must be used to correctly transform the tensor data)
Registration Results
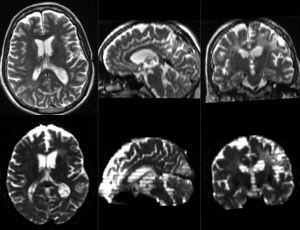 |
baseline & T2 before registration (click to enlarge) |
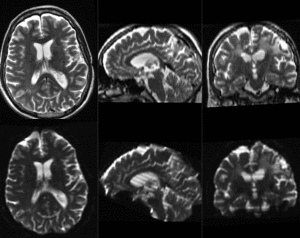 |
baseline to T2 after affine+nonrigid alignment (click to enlarge) |
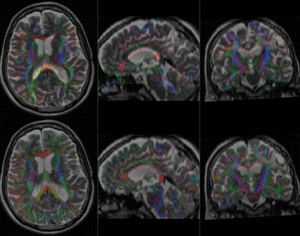 |
DTI and T2 before & after registration (click to enlarge) |
Discussion: Key Strategies
- the strong EPI-based distortions of the DTI image make nonrigid registration necessary
- initial alignment & overlap is sufficient so that no "initialization" methods are necessary and registration can succeed without.
- contrast & initial pose are similar enough for registration to succeed without any masking. However the DTI estimation procedure does provide an optional mask that is usually very helpful in registering cases with more "distracting" image content.
- the DTI in this example is isotropic and hence can be resampled directly. If the DTI contains strong anisotropy of ratios 1:3 or greater, reorienting the DTI can lead to strong artifacts (e.g. in axial direction appear as blue cast in the color orientation view). In that case it is necessary to resample the DWI in the original orientation to an isotropic size before reorienting. It may also be advisable to first reorient the DWI and perform the DTI estimation afterwards.
