Difference between revisions of "Documentation/Nightly/Extensions/ArduinoController"
From Slicer Wiki
Tag: 2017 source edit |
Tag: 2017 source edit |
||
| Line 51: | Line 51: | ||
{| | {| | ||
| | | | ||
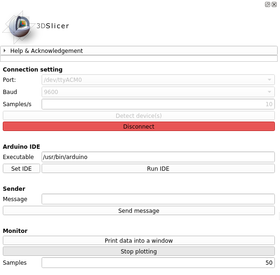
| − | |[[Image: | + | |[[Image:ArduinoController_UI_screenshot.png|thumb|280px|Arduino Connection Module UI]] |
|} | |} | ||
| Line 64: | Line 64: | ||
<!-- ---------------------------- -->{{documentation/{{documentation/version}}/module-section|Information for Developers}} | <!-- ---------------------------- -->{{documentation/{{documentation/version}}/module-section|Information for Developers}} | ||
{{documentation/{{documentation/version}}/module-developerinfo}} | {{documentation/{{documentation/version}}/module-developerinfo}} | ||
| + | https://github.com/pzaffino/SlicerArduinoController | ||
<!-- ---------------------------- --> | <!-- ---------------------------- --> | ||
Revision as of 11:14, 4 February 2020
Home < Documentation < Nightly < Extensions < ArduinoController
|
For the latest Slicer documentation, visit the read-the-docs. |
Introduction and Acknowledgements
|
Extension: ArduinoController |
Module Description
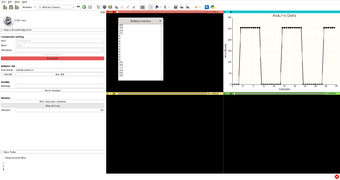
- Arduino Connect: this module allows to connect Slicer and Arduino board. This will be use to build other modules and applications.
Additional modules will come later.
Use Cases
- Arduino Connect
Users wants to connect, receive and transmit data from/to Arduino. Connection parameters can be set according to user environment.
Tutorials
- Arduino Connect
1. Connect Arduino to the system (user has to take care of Arduino code side).
2. Set port and other connection parameters according to PC environment
4. Click Connect button
5. Enjoy connection
Panels and their use
Similar Modules
References
Information for Developers
| Section under construction. |

