Difference between revisions of "Documentation/4.4/gif tutorial"
From Slicer Wiki
| Line 20: | Line 20: | ||
{|style="width: 62%; height: 200px;" border="1" | {|style="width: 62%; height: 200px;" border="1" | ||
===Segmentation=== | ===Segmentation=== | ||
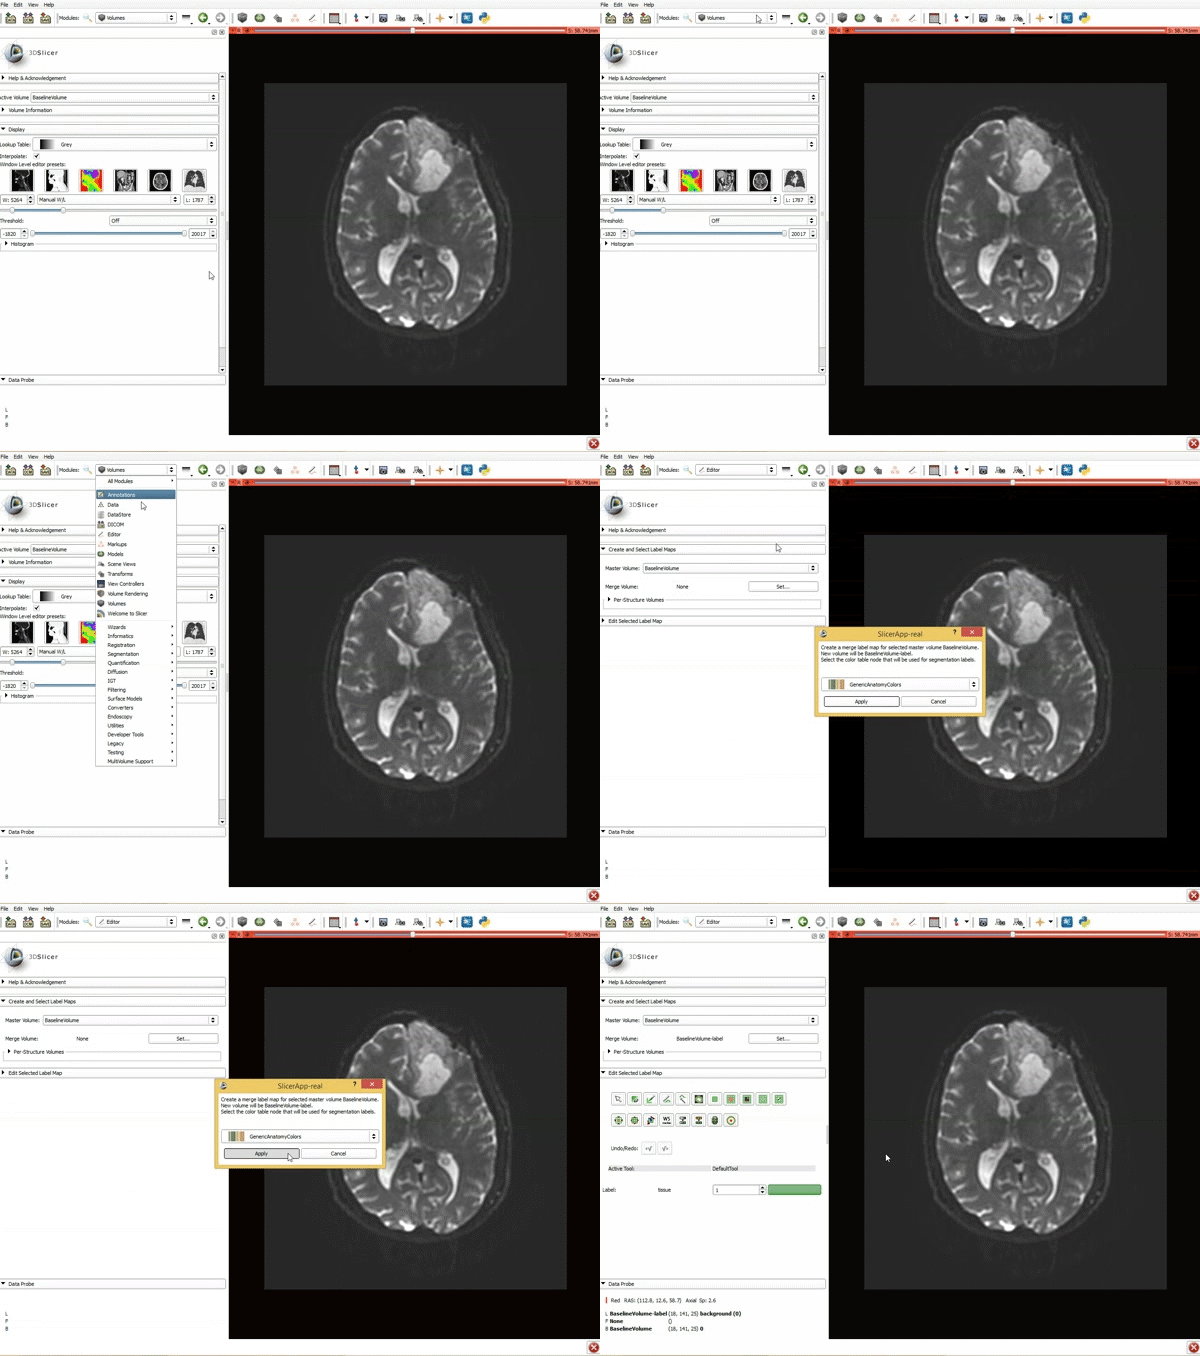
| − | |[[image:5.gif|600px|frame|a) Click on the Modules menu and select the module Editor. b)The ‘SlicerApp-real’ window appears. Select the label map GenericAnatomyColors and click Apply.]] | + | |[[image:5.gif|600px|frame|1. a) Click on the Modules menu and select the module Editor. b)The ‘SlicerApp-real’ window appears. Select the label map GenericAnatomyColors and click Apply.]] |
|- style="height: 100px;" | |- style="height: 100px;" | ||
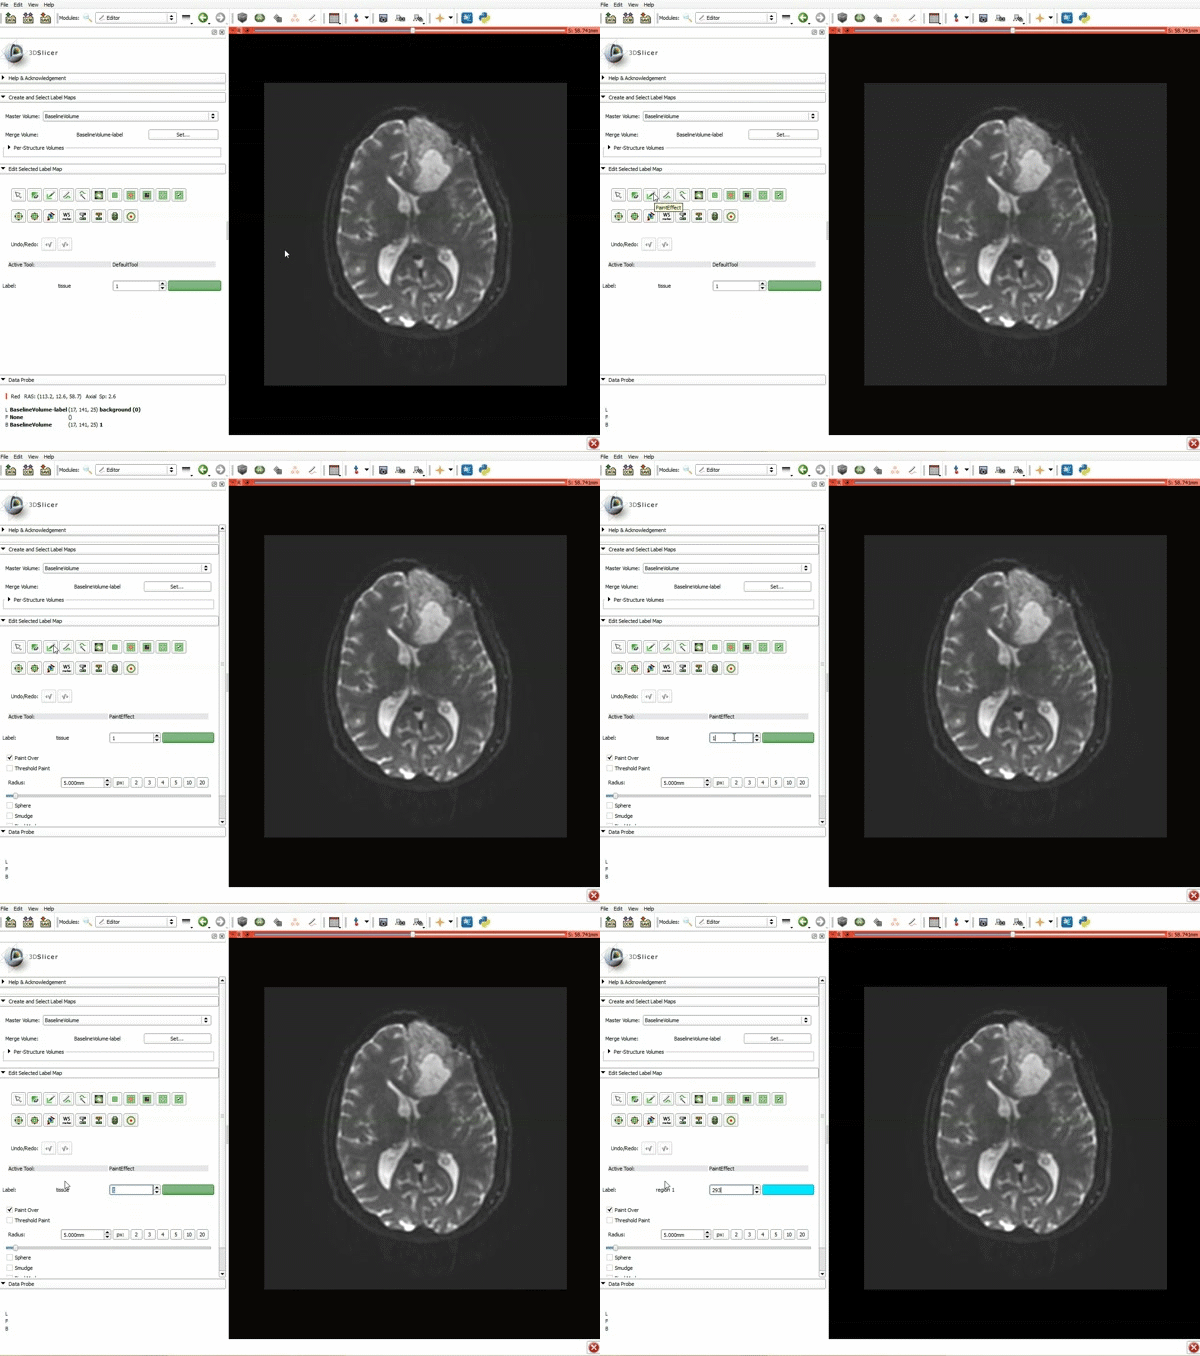
| − | |[[image:6.gif|600px|frame|a) Select the PaintEffect b) Scroll down the Editor module and choose color #293 for the region 1 label]] | + | |[[image:6.gif|600px|frame|2. a) Select the PaintEffect b) Scroll down the Editor module and choose color #293 for the region 1 label]] |
|- style="height: 100px;" | |- style="height: 100px;" | ||
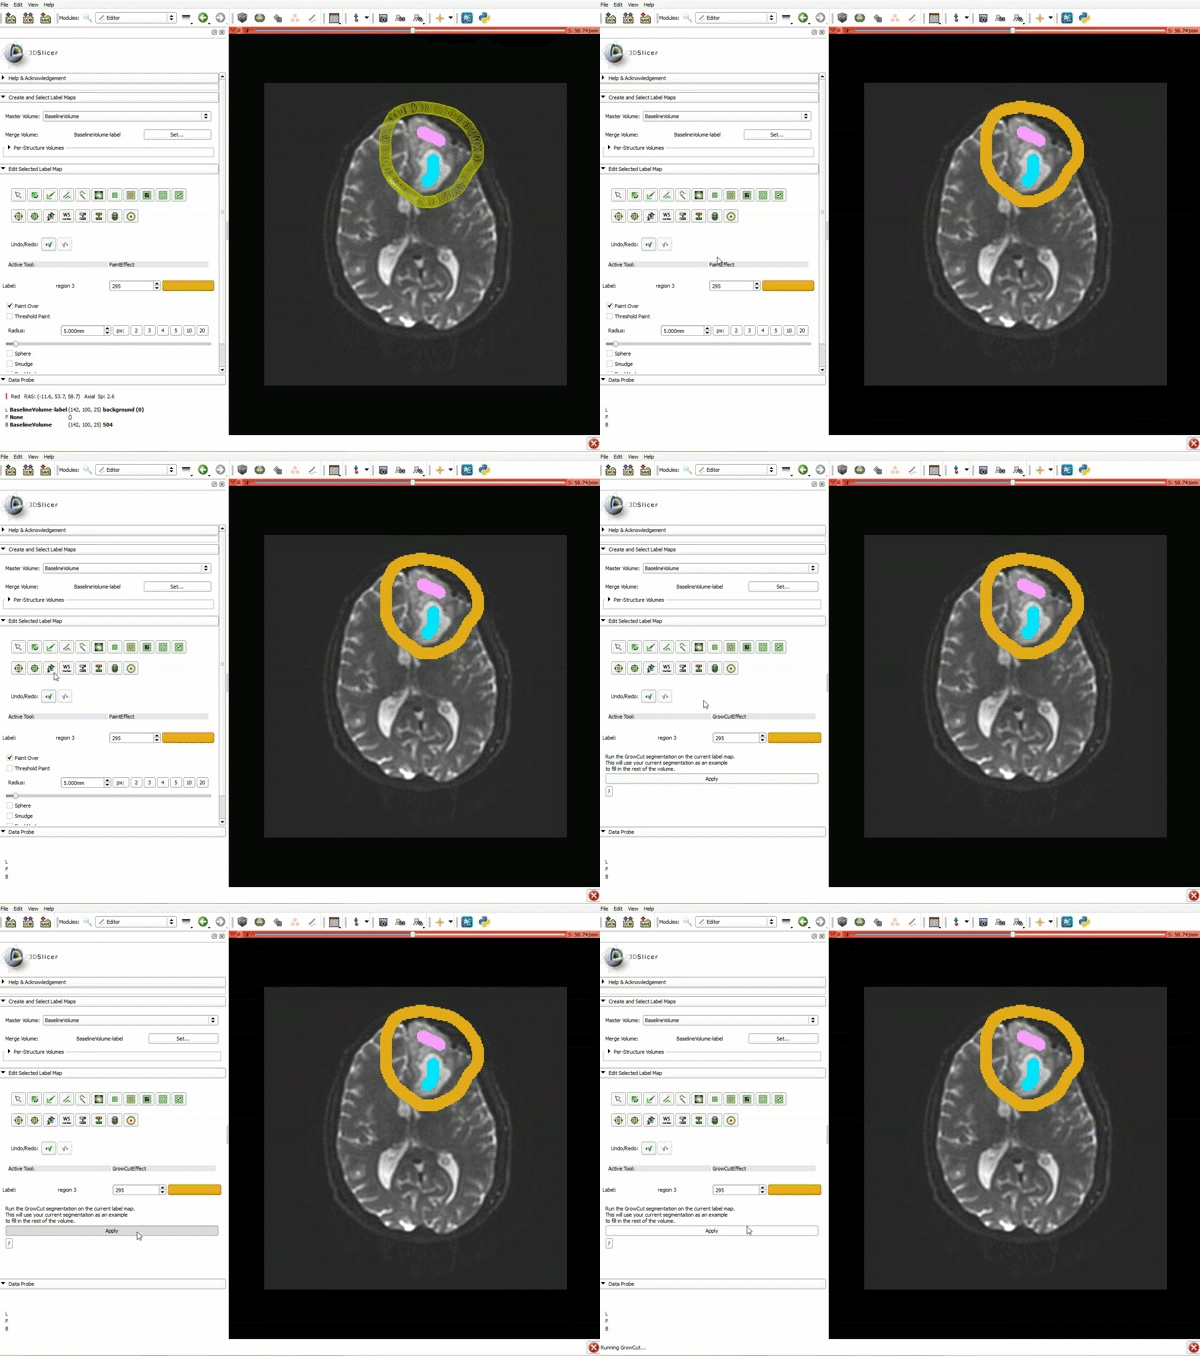
| − | |[[image:7.gif|600px|frame|a) In a single motion, draw a short line in the cystic part of the tumor b) Select color #294 for the mass label and, again in a single motion, draw a short line in the solid part of the tumor c) Select color #295 for the region 3 and draw a circle around the tumor]] | + | |[[image:7.gif|600px|frame|3. a) In a single motion, draw a short line in the cystic part of the tumor b) Select color #294 for the mass label and, again in a single motion, draw a short line in the solid part of the tumor c) Select color #295 for the region 3 and draw a circle around the tumor]] |
|- style="height: 100px;" | |- style="height: 100px;" | ||
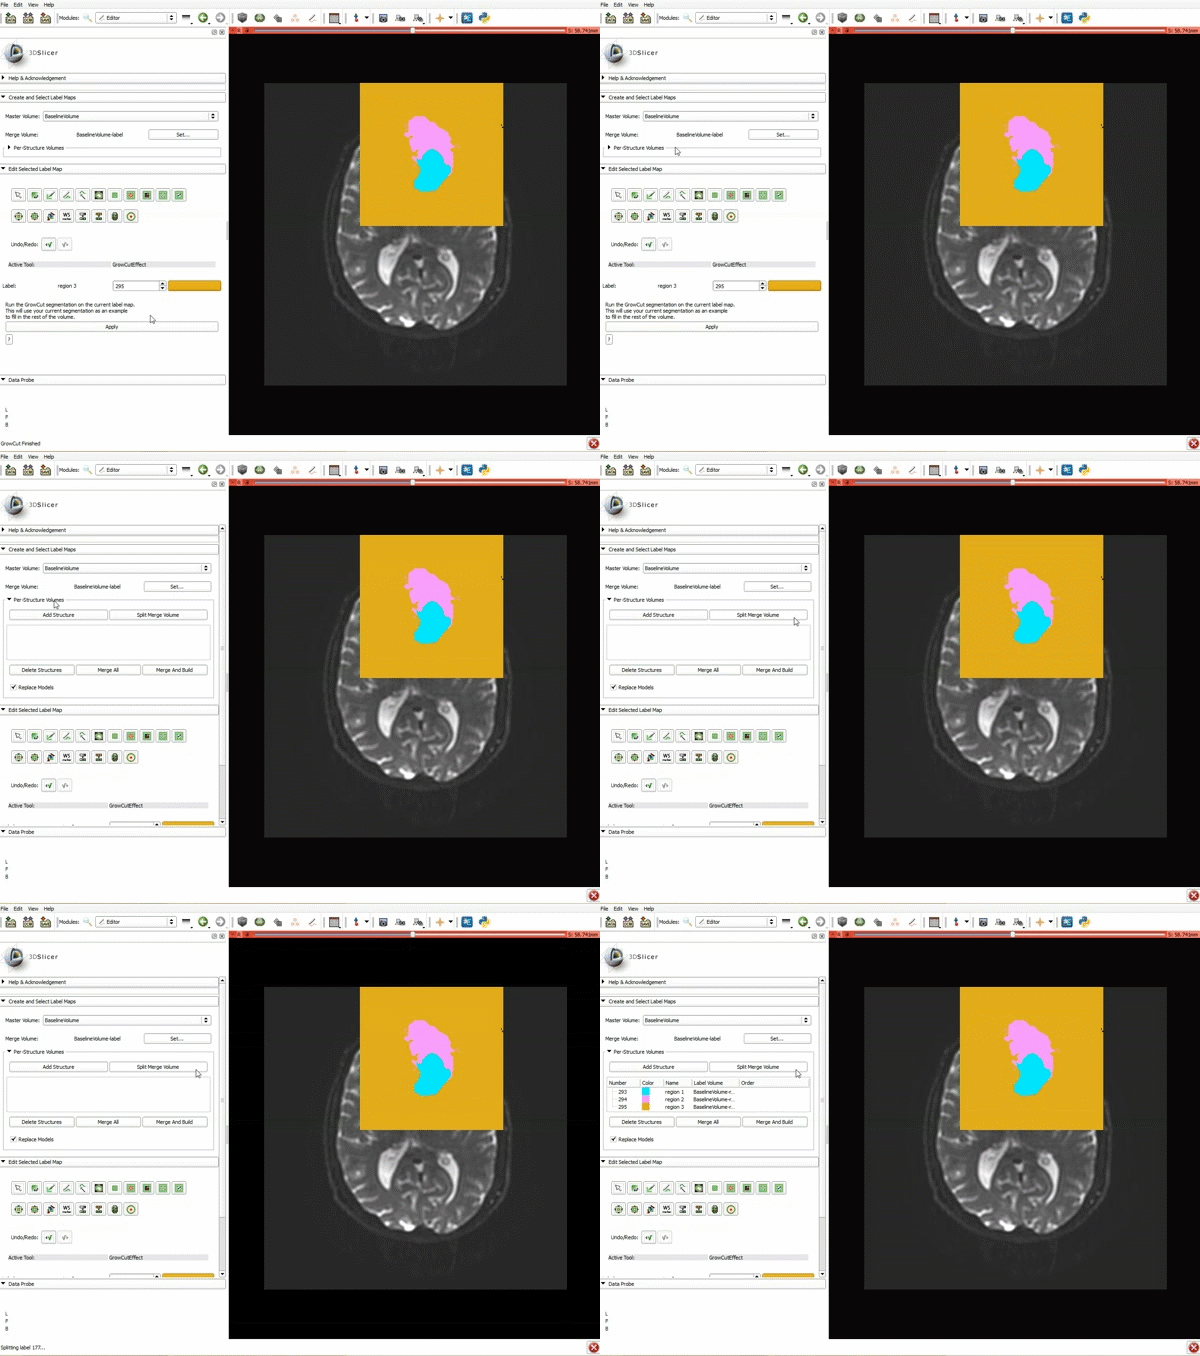
| − | |[[image:8.gif|600px|frame|Select the GrowCutEffect tool and then click Apply]] | + | |[[image:8.gif|600px|frame|4. Select the GrowCutEffect tool and then click Apply]] |
|- style="height: 100px;" | |- style="height: 100px;" | ||
| − | |[[image:9.gif|600px|frame|Scroll up the Editor menu and select the tab Per-Structure Volumes. Then click Split Merge Volume.]] | + | |[[image:9.gif|600px|frame|5. Scroll up the Editor menu and select the tab Per-Structure Volumes. Then click Split Merge Volume.]] |
|- style="height: 100px;" | |- style="height: 100px;" | ||
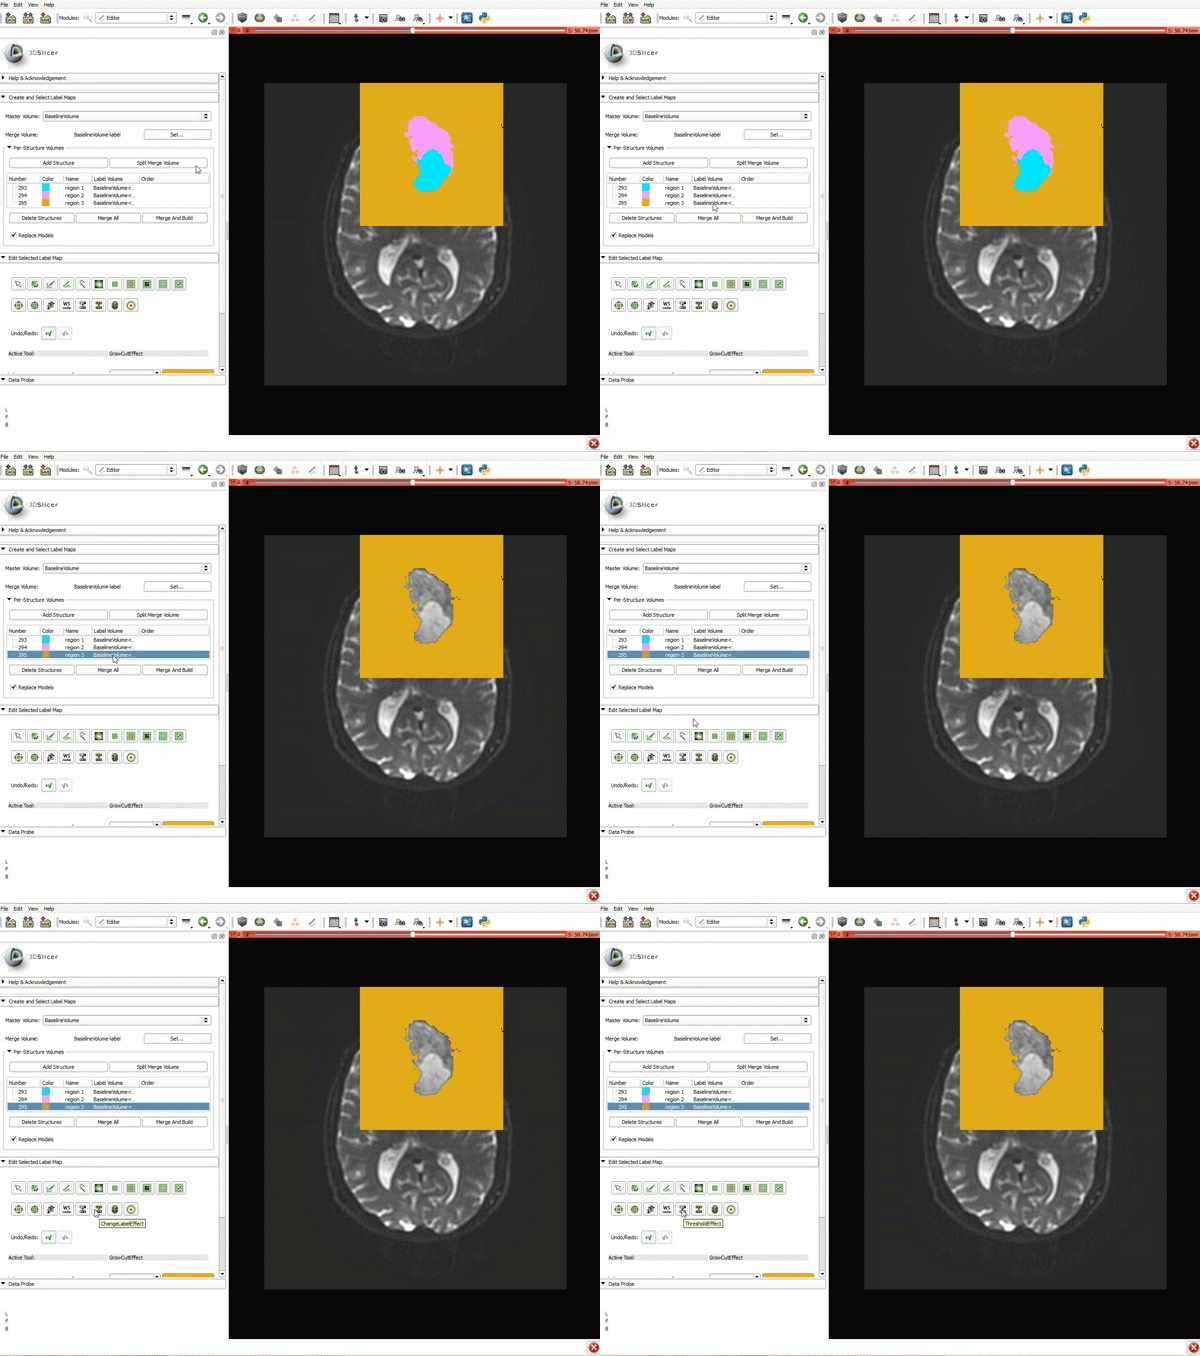
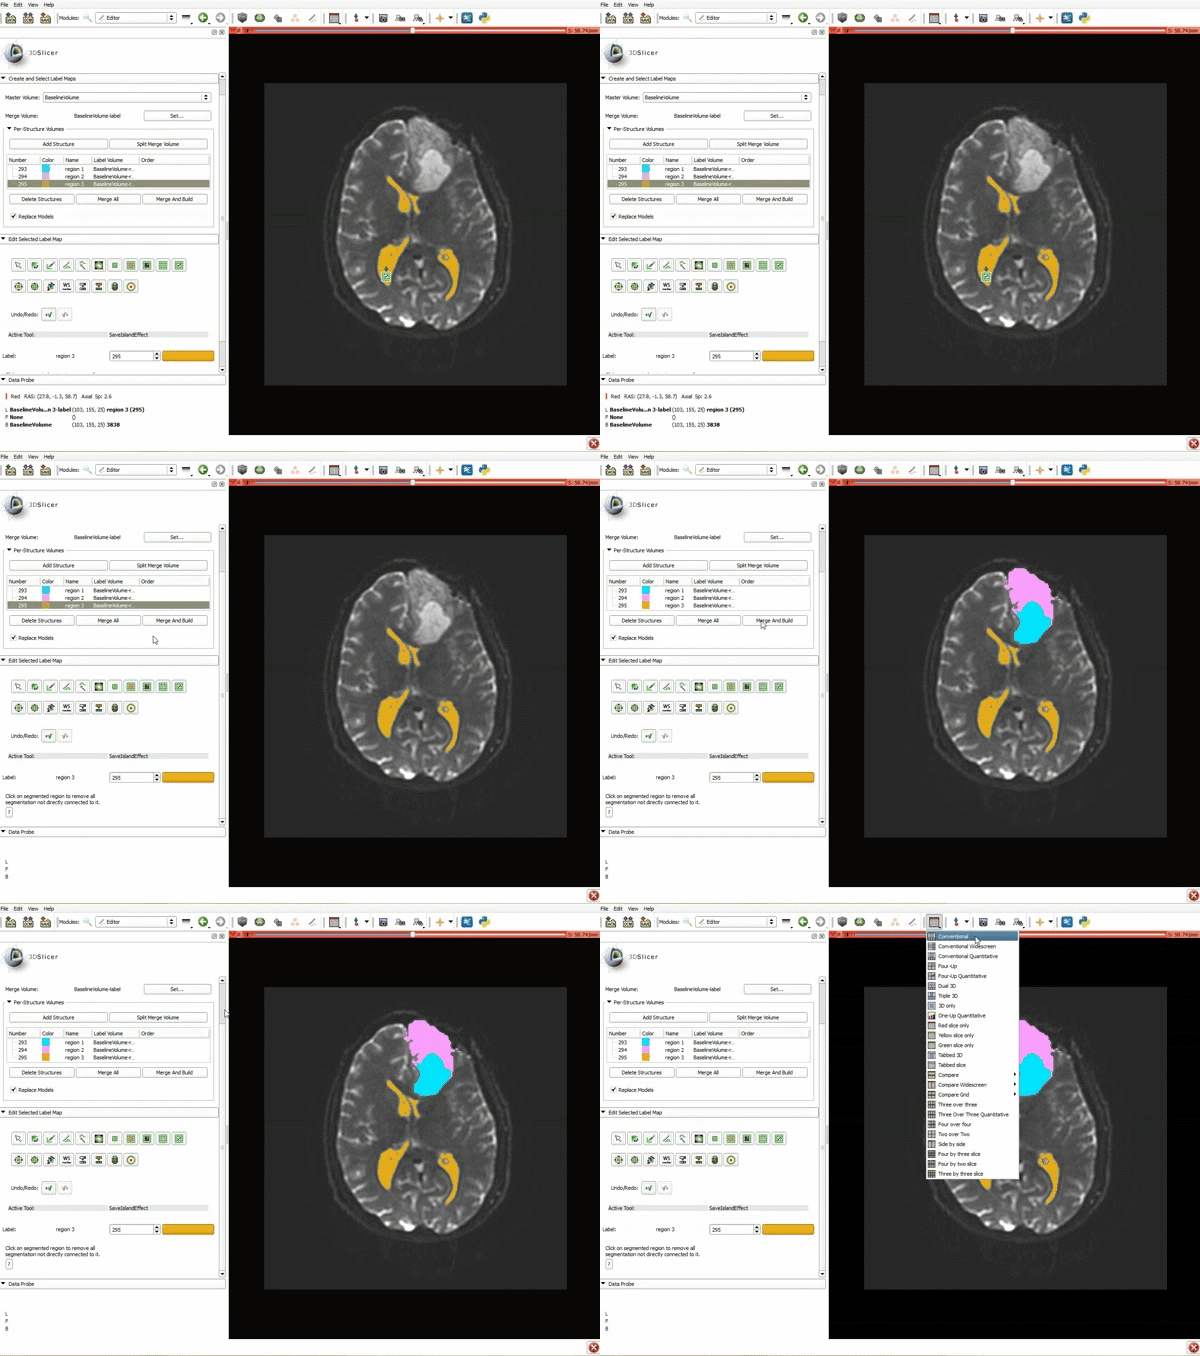
| − | |[[image:10.gif|600px|frame|a) Select the volume BaselineVolumeregion_3-label so that it is highlighted and that the yellow region is visible in the viewer b) Select the ThresholdEffect tool]] | + | |[[image:10.gif|600px|frame|6. a) Select the volume BaselineVolumeregion_3-label so that it is highlighted and that the yellow region is visible in the viewer b) Select the ThresholdEffect tool]] |
|- style="height: 100px;" | |- style="height: 100px;" | ||
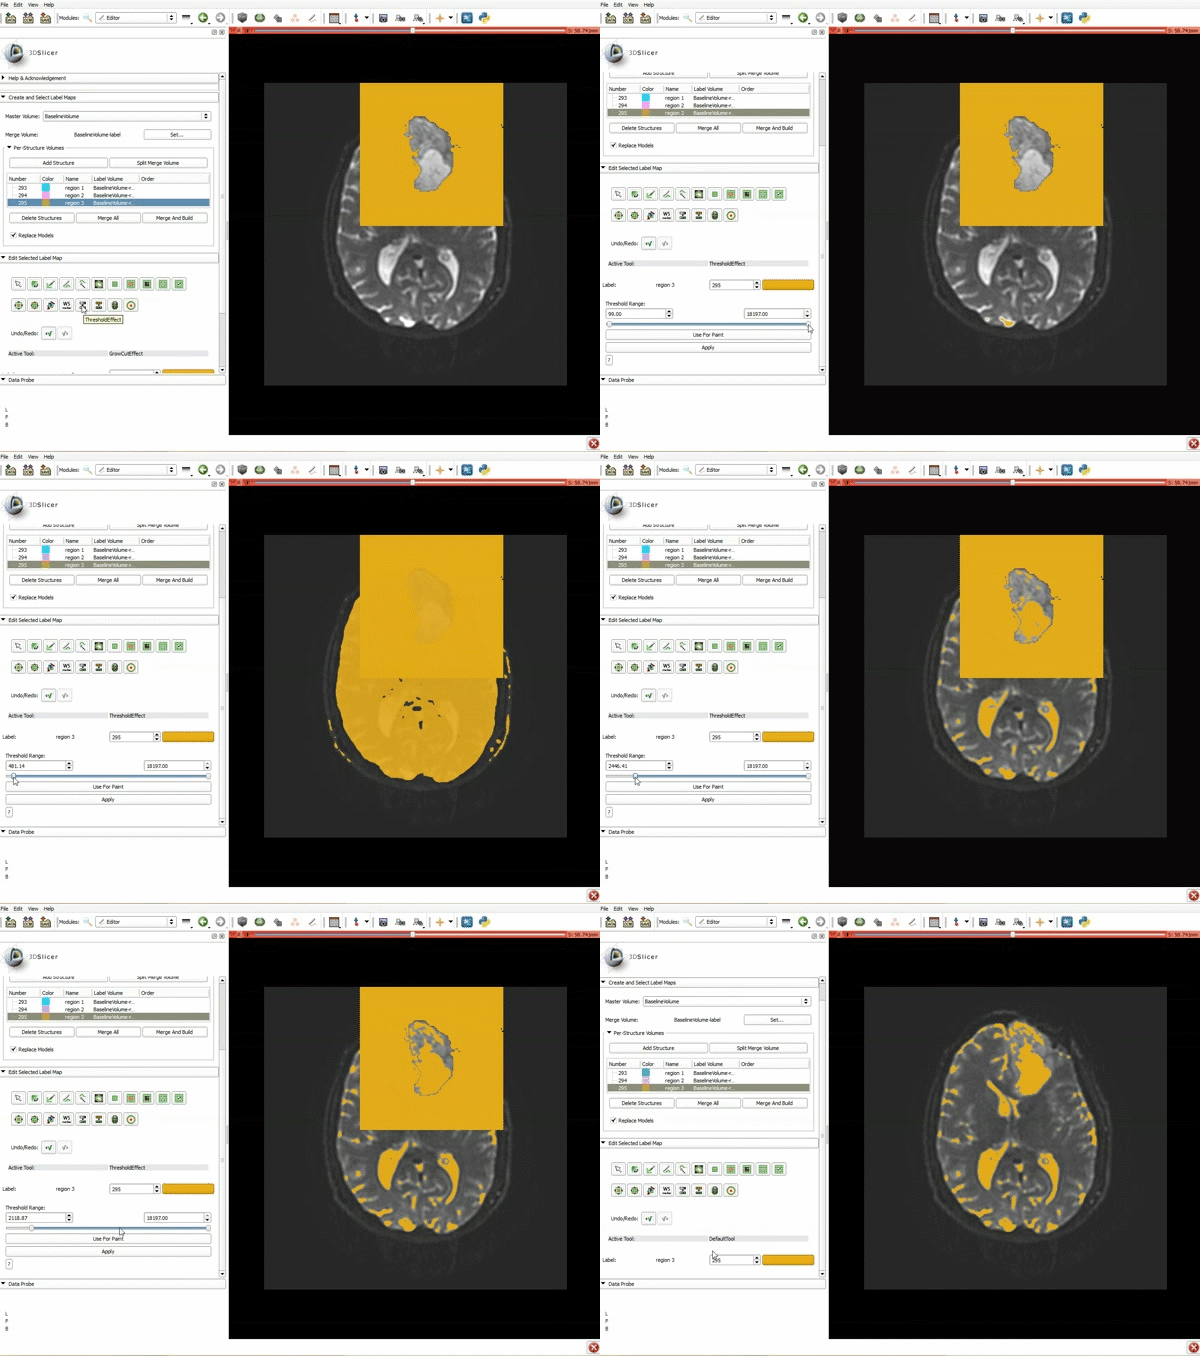
| − | |[[image:11.gif|600px|frame| | + | |[[image:11.gif|600px|frame|7. Scroll down the Editor module and set the lower Threshold Range to 1700 and click Apply.]] |
|- style="height: 100px;" | |- style="height: 100px;" | ||
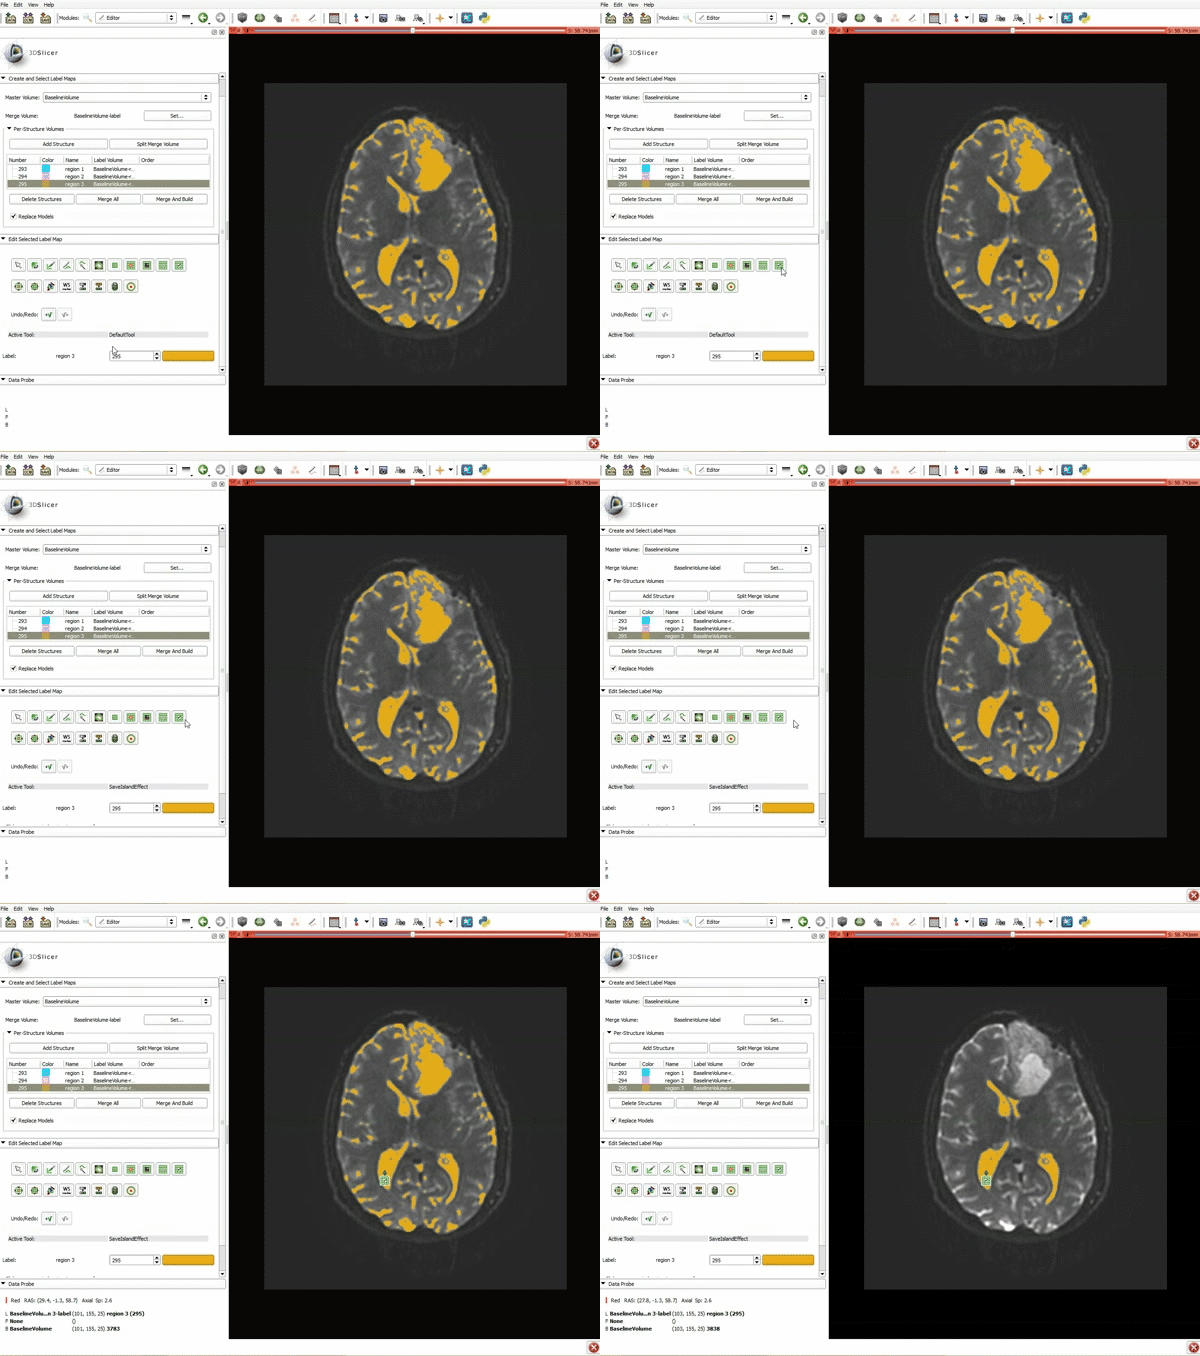
| − | |[[image:12.gif|600px|frame| | + | |[[image:12.gif|600px|frame|8. a) Select the SaveIslandEffect in the Editor module b) With the SaveIslandEffect tool equipped, click in the occipital horn of the ventricle.]] |
|- style="height: 100px;" | |- style="height: 100px;" | ||
| − | |[[image:13.gif|600px|frame| | + | |[[image:13.gif|600px|frame|9. a) Scroll back up and cllick on Merge and Build to merge the diferent label maps, and generate the 3D models of the tumor and ventricles using a Marching Cubes algorithm. b) Click on the Layout menu and select Conventional.]] |
|- style="height: 100px;" | |- style="height: 100px;" | ||
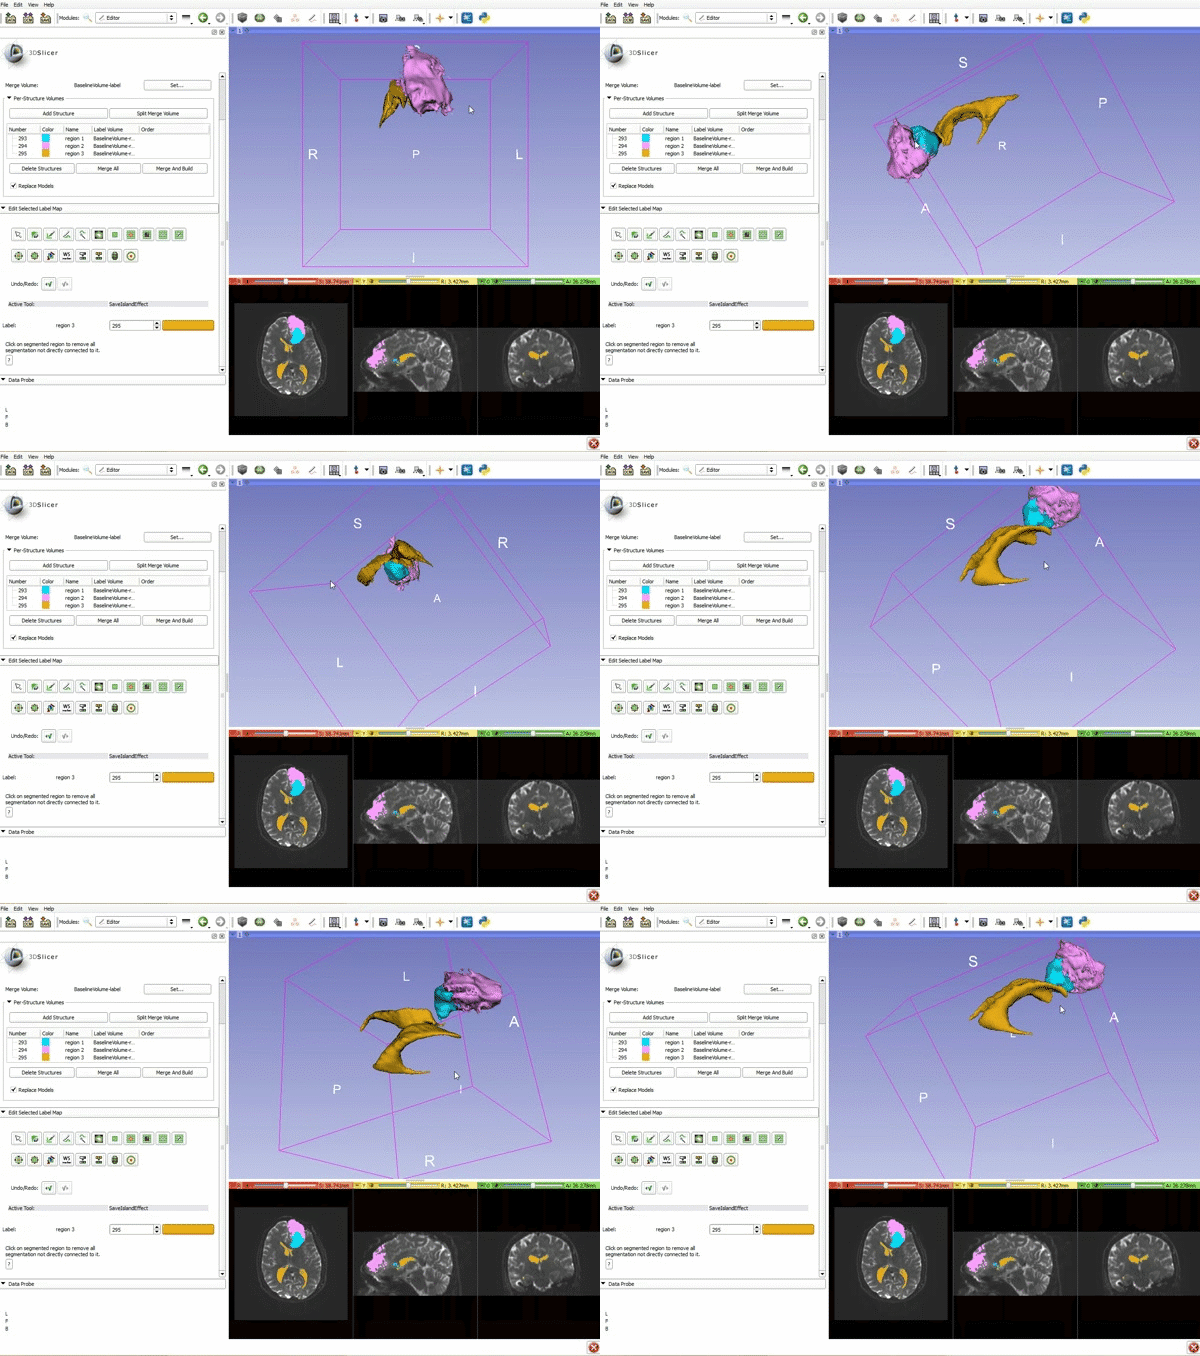
| − | |[[image:14.gif|600px|frame| | + | |[[image:14.gif|600px|frame|10.]] |
|- style="height: 100px;" | |- style="height: 100px;" | ||
| − | |[[image:15.gif|600px|frame| | + | |[[image:15.gif|600px|frame|11.]] |
|- style="height: 100px;" | |- style="height: 100px;" | ||
|} | |} | ||
</div> | </div> | ||
Revision as of 19:26, 8 July 2015
Home < Documentation < 4.4 < gif tutorial|
