Difference between revisions of "Documentation/Nightly/Developers/Tutorials/QtDesigner"
| (One intermediate revision by the same user not shown) | |||
| Line 77: | Line 77: | ||
== Frequently Asked Questions == | == Frequently Asked Questions == | ||
* My [http://slicer.org/doc/html/classqMRMLNodeComboBox.html qMRMLNodeComboBox] widget is always disabled (gray) in my module. | * My [http://slicer.org/doc/html/classqMRMLNodeComboBox.html qMRMLNodeComboBox] widget is always disabled (gray) in my module. | ||
| − | To be enabled, qMRMLNodeComboBox needs a MRML scene. You can set a MRML scene to the combobox programmatically or directly from Qt Designer. Doing it in Qt Designer is the recommended way, to do so you need to be in [http://doc.qt. | + | To be enabled, qMRMLNodeComboBox needs a MRML scene. You can set a MRML scene to the combobox programmatically or directly from Qt Designer. Doing it in Qt Designer is the recommended way, to do so you need to be in [http://doc.qt.io/qt-5/designer-connection-mode.html Connection mode] and connect the signal [http://slicer.org/doc/html/classqSlicerWidget.html#a9c28318f7810ccce517ea7a1b0051da4 mrmlSceneChanged(vtkMRMLScene*)] of the module panel (of type [http://slicer.org/doc/html/classqSlicerWidget.html qSlicerWidget]) with the slot [http://slicer.org/doc/html/classqMRMLNodeComboBox.html#a2249be3ccec4783b592f738f1ef7bea3 setMRMLScene(vtkMRMLScene*)]. |
The programmatic connection can be done in the <code>setup()</code> method of the module widget (or <code>init()</code> of the module widget pimpl): | The programmatic connection can be done in the <code>setup()</code> method of the module widget (or <code>init()</code> of the module widget pimpl): | ||
void qSlicerDataModuleWidget::setup() | void qSlicerDataModuleWidget::setup() | ||
Latest revision as of 01:12, 23 January 2018
Home < Documentation < Nightly < Developers < Tutorials < QtDesigner
|
For the latest Slicer documentation, visit the read-the-docs. |
Contents
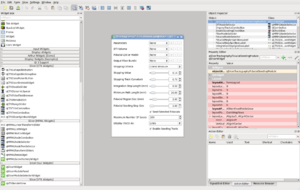
Using custom widgets in Qt Designer
Straight to the point
- Windows
- Compile Slicer in Release mode OR build Qt in Debug
- All
cd Slicer-build;
./Slicer --designer
If the option --designer is not available, you should consider using QtCreator. See here for more details.
Qt Designer requirements
In order to have the CTK and MRML widgets in Qt Designer, Qt Designer offers 2 options:
- the first (not detailed here) is to copy (or symlink) the CTK and MRML plugin libraries into %QT_DIR%/plugins/designer,
- the second is to set the environment variable
QT_PLUGIN_PATHto the directory Slicer-build/bin containing the subdirectory designer with the plugin libraries.
Note: Qt requires that the directory containing the designer plugins is named "designer".
Consider reading the Qt Designer documentation. If the widgets do not appear in Qt Designer, then open the "Help -> About Plugin" dialog and report the error associated to the plugin dll.
Windows notes
On Windows, Qt Designer can only load plugins that have been compiled in the same build mode than Qt Designer. For example, if Qt is built in Debug mode, the plugins must also be built in Debug mode to be loaded by Qt Designer.
If Qt is configured to build in both debug and release modes, Qt Designer is built in release mode only. If that case, it is necessary to ensure that plugins are also built in release mode. Otherwise, you can open the solution file for Qt, and recompile Designer in debug mode.
Running Qt Designer with the correct environment variables
- On Windows, compile Slicer in the same build mode than Qt. If Qt is in Debug mode, compile Slicer in Debug mode, if it's in Release or Debug&Release mode, compile Slicer in Release mode.
- run Qt Designer via Slicer launcher located in Slicer-build.
| Mac Os X | Linux | Windows |
|---|---|---|
$ cd Slicer-build $ ./Slicer --designer |
> cd Slicer-build > .\Slicer.exe --designer | |
If the option --designer is not available, you should consider using QtCreator. See here for more details.
Build Slicer
- Once you are satisfied with UI, save the file, quit Designer and build Slicer to take the changes into account.
| Mac Os X | Linux | Windows |
|---|---|---|
$ make -j4 or just build the related project $ make -j4 qSlicerMY_MODULE_NAMEModuleWidget |
Open the inner solution file ...Slicer-Superbuild\Slicer-build\Slicer.sln and build the solution (F7) or build project qSlicerMY_MODULE_NAMEModuleWidgets
| |
It generates a ui_qSlicerMY_MODULE_NAMEModule.h file in ...Slicer-Superbuild/Slicer-buildModules/Loadable/MY_MODULE_NAME/.
That file is used by ...Slicer4/Modules/Loadable/MY_MODULE_NAME/qSlicerMY_MODULE_NAMEModuleWidget.cxx.
Note: The objectNames of each widget in the UI correspond (see the Property editor) to the variable names in C++. From your code, you can access the widgets by their objectName.
- And launch Slicer to see the result
| Mac Os X | Linux | Windows |
|---|---|---|
$ ./Slicer |
> .\Slicer.exe | |
Frequently Asked Questions
- My qMRMLNodeComboBox widget is always disabled (gray) in my module.
To be enabled, qMRMLNodeComboBox needs a MRML scene. You can set a MRML scene to the combobox programmatically or directly from Qt Designer. Doing it in Qt Designer is the recommended way, to do so you need to be in Connection mode and connect the signal mrmlSceneChanged(vtkMRMLScene*) of the module panel (of type qSlicerWidget) with the slot setMRMLScene(vtkMRMLScene*).
The programmatic connection can be done in the setup() method of the module widget (or init() of the module widget pimpl):
void qSlicerDataModuleWidget::setup()
{
...
connect(this, SIGNAL(mrmlSceneChanged(vtkMRMLScene*)),
        myWidget, SLOT(setMRMLScene(vtkMRMLScene*)));
...
}
