Difference between revisions of "Modules:PlastimatchXFORMWARP"
| (3 intermediate revisions by the same user not shown) | |||
| Line 25: | Line 25: | ||
{| | {| | ||
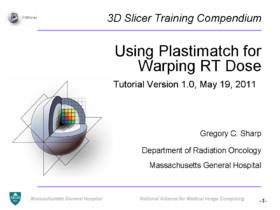
|[[Image:3D_Slicer_Plastimatch_Dose_Warping_Tutorial.png|thumb|280px|[http://forge.abcd.harvard.edu/gf/download/frsrelease/110/1831/3D_Slicer_Plastimatch_Dose_Warping_Tutorial.ppt Download tutorial (PPT)]]] | |[[Image:3D_Slicer_Plastimatch_Dose_Warping_Tutorial.png|thumb|280px|[http://forge.abcd.harvard.edu/gf/download/frsrelease/110/1831/3D_Slicer_Plastimatch_Dose_Warping_Tutorial.ppt Download tutorial (PPT)]]] | ||
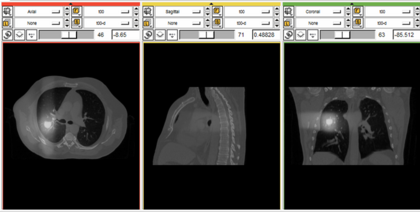
| − | |[[Image:popi-dose.png|thumb| | + | |[[Image:popi-dose.png|thumb|420px|[http://forge.abcd.harvard.edu/gf/download/frsrelease/85/1828/popi-plan.tar.gz (Download tutorial data)]]] |
|} | |} | ||
| Line 34: | Line 34: | ||
| | | | ||
* '''Input/Output panel:''' | * '''Input/Output panel:''' | ||
| − | ** '''Input | + | ** '''Input Volume:''' Here you choose the volume which will be warped. |
| − | ** ''' | + | ** '''Input transform (MRML):''' Here you choose the transform from MRML tree. |
| − | ** ''' | + | ** '''Input transform (file):''' Here you choose the transform from file (type the full path). |
| − | ** '''Output | + | ** '''Output Volume:''' Here you choose where to put the output volume. Unless you want to replace an existing volume, you should choose "Create New Volume". |
| − | + | |[[Image:panel.png|thumb|280px|User Interface]] | |
| − | |[[Image: | ||
|} | |} | ||
Latest revision as of 16:47, 2 June 2011
Home < Modules:PlastimatchXFORMWARPReturn to Slicer 3.6 Documentation
Plastimatch > Warping with transform
General Information
Module Type & Category
Type: CLI
Category: Plastimatch
Authors, Collaborators & Contact
- Authors: See AUTHORS.TXT contained within the package
- Contact: Greg Sharp, Department of Radiation Oncology, Massachusetts General Hospital (gcsharp@partners.org)
- Web page: http://plastimatch.org
Module Description
This is the module for warping image volumes with transforms. It allows you to select B-spline deformable registration transform (B-spline coefficients) or vector field directrly from MRML tree or from file and use it to warp images, structure sets and doses.
Usage
Tutorials
Quick Tour of Features and Use
|
Development
Notes from the Developer(s)
Developer-oriented documentation is found on the plastimatch web site: http://plastimatch.org
Dependencies
This module has no dependencies.
Tests
Plastimatch features approximately 100 test cases.
Known bugs
Usability issues
Please report usability issues to the bug tracker.
Source code & documentation
We recommended to download the latest source code from subversion:
Documentation:
More Information
About plastimatch
Plastimatch is an open source software for deformable image registration. It is designed for high-performance volumetric registration of medical images, such as X-ray computed tomography (CT), magnetic resonance imaging (MRI), and positron emission tomography (PET). Software features include:
- B-spline method for deformable image registration (GPU and multicore accelerated)
- Demons method for deformable image registration (GPU accelerated)
- ITK-based algorithms for translation, rigid, affine, demons, and B-spline registration
- Pipelined, multi-stage registration framework with seamless conversion between most algorithms and transform types
- Landmark-based deformable registration using thin-plate splines for global registration
- Landmark-based deformable registration using radial basis functions for local corrections
- Broad support for 3D image file formats (using ITK), including Dicom, Nifti, NRRD, MetaImage, and Analyze
- Dicom and DicomRT import and export
- XiO import and export
- Plugins for 3D Slicer
Plastimatch also features two handy utilities which are not directly related to image registration:
- FDK cone-beam CT reconstruction (GPU and multicore accelerated)
- Digitally reconstructed radiograph (DRR) generation (GPU and multicore accelerated)
Acknowledgment
National Institutes of Health
NIH / NCI 6-PO1 CA 21239
Federal share of program income earned by MGH on C06CA059267
Progetto Rocca Foundation
A collaboration between MIT and Politecnico di Milano
References
- G Sharp et al. "Plastimatch - An open source software suite for radiotherapy image processing," Proceedings of the XVIth International Conference on the use of Computers in Radiotherapy, May, 2010.


