Difference between revisions of "Documentation:Nightly:Registration:RegistrationLibrary:RegLib C10"
(Created page with 'Back to Registration Library <br> = Slicer Registration Library Case #10: group atlas to structural MRI = == Input == …') |
(→Input) |
||
| Line 2: | Line 2: | ||
= Slicer Registration Library Case #10: group atlas to structural MRI = | = Slicer Registration Library Case #10: group atlas to structural MRI = | ||
== Input == | == Input == | ||
| + | {| style="color:#bbbbbb; " cellpadding="10" cellspacing="0" border="0" | ||
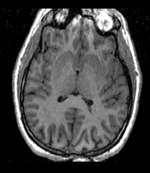
| + | |[[Image:RegLib_C10_Thumb1.png|150px|left|this is the fixed reference image. All images are aligned into this space]] | ||
| + | |[[Image:RegArrow_NonRigid.png|100px|left]] | ||
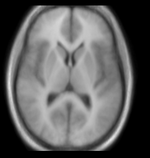
| + | |[[Image:RegLib_C10_Thumb2.png|150px|left|this is the moving target image, to be aligned with the reference image on the left]] | ||
| + | |- | ||
| + | |fixed image/target<br>T1 | ||
| + | | | ||
| + | |moving image<br>group atlas | ||
| + | |} | ||
==Description == | ==Description == | ||
Revision as of 17:09, 4 September 2013
Home < Documentation:Nightly:Registration:RegistrationLibrary:RegLib C10Contents
Slicer Registration Library Case #10: group atlas to structural MRI
Input
| fixed image/target T1 |
moving image group atlas |
Description
This shows registration of an fMRI baseline scan to a structural reference T1. The fMRI suffers from low SNR and bad distortions we seek to correct. Approach: we first compute a rigid alignment of the fMRI to the T1. We then expand this to a nonrigid transform, which we constrain either by explicit limits on the absolute deformation amount or via a mask. Constraints are necessary because the skull present in the T1 would otherwise negatively affect the registration result.
Modules used
Download (from NAMIC MIDAS)
Why 2 sets of files? The "input data" mrb includes only the unregistered data to try the method yourself from start to finish. The full dataset includes intermediate files and results (transforms, resampled images etc.). If you use the full dataset we recommend to choose different names for the images/results you create yourself to distinguish the old data from the new one you generated yourself.
- RegLib_C09.mrb: input data only, use this to run the tutorial from the start (Slicer mrb file. 40 MB).
- RegLib_C09_full.mrb: includes raw data + all solutions and intermediate files, use to browse/verify (Slicer mrb file. 182 MB).
Keywords
MRI, fMRI, brain, head, intra-subject
Video Screencasts
- Movie/screencast showing rigid + BSpline registration
- Movie/screencast showing installation and use of the "SwissSkullStripper" for generating a T1 mask
- Movie/screencast showing an alternative BSpline registration using masks instead of an explicit deformation limit
Procedure
- Rigid Registration: register fMRI to T1 (screencast for this step)
- open the General Registration (BRAINS) module
- Fixed Image Volume: T1 (SPGR)
- Moving Image Volume: fMRI
- Output Settings:
- Slicer BSpline Transform": none
- Slicer Linear Transform: create & rename new transform: Xf1_Rigid.tfm
- Output Image Volume: none
- Registration Phases: check box for Rigid
- Main Parameters
- Number of Samples: 200,000
- click: Apply; runtime < 10 sec (MacPro QuadCore 2.4GHz)
- Nonrigid BSpline Registration
- Fixed Image Volume: T1 SPGR
- Moving Image Volume: fMRI
- Slicer BSpline Transform": create & rename new transform: Xf2_BSpline.tfm
- Slicer Linear Transform: none
- Output Image Volume: create & rename new: fMRI_Xf2
- Initialization Transform:select "Xf1_Rigid" created above
- Initialization Transform Mode: off
- Registration Phases: uncheck boxe for Rigid and instead check BSpline
- Main Parameters: Number of Samples: 200,000
- Advanced Output Settings: Maximum B-Spline Displacement: 3
- click: Apply
Alternate Option: Masking
- if not yet present, install the SwissSkullStripper module: (screencast for this step)
- open the ExtensionsManager

- locate the SwissSkullStripper" extension (under segmentation). Click on the "Install" button
- you will need to restart Slicer to complete the installation. Make sure to save all your work before restarting.
- upon restart, reload the data and open the SwissSkullStripper module (under Segmentation)
- You will need to download an atlas image and its mask. Link is here: SwissSkullStripper
- Atlas Volume: select the atlas image you downloaded.
- Atlas Mask Volume: select the atlas mask image you downloaded.
- Patient Volume: select the T1 SPGR
- Patient Output Volume: create and rename new: "T1_stripped" or similar
- Patient Mask Label: : create and rename new: "T1_mask"
- Apply
- go to the Editor
- Merge Volume: "T1_mask"
- select the "Dilation" tool. Click "Apply" 2-3 times to extend the mask beyond the brain surface
- open the ExtensionsManager
- Build Mask for fMRI: (screencast for this step)
- open the Editor
- Master Volume: fMRI
- Merge Volume: create new: fMRI_label
- select the Threshold tool, reduce threshold until entire brain is selected.
- click "Apply"
- select the "Dilation" tool. Click "Apply" 2-3 times to extend the mask beyond the brain surface
- Masked BSpline Registration: (screencast for this step)
- repeat the BSpline registration above, with the following changes:
- Turn off the deformation Limit: Advanced Output Settings: Maximum B-Spline Displacement: 0
- Mask Option: select ROI button
- ROI Masking input fixed: select "T1_mask" generated above
- ROI Masking input moving: select "fMRI_mask" generated above
- Apply
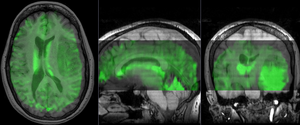
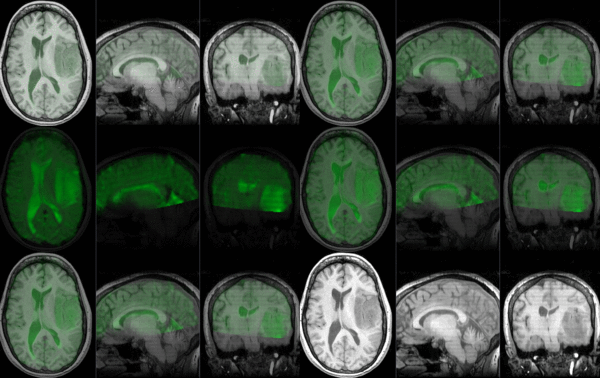
Registration Results
 unregistered (click to enlarge) unregistered (click to enlarge)
|
 after rigid registration (click to enlarge) after rigid registration (click to enlarge)
|
 after nonrigid BSpline registration (click to enlarge) after nonrigid BSpline registration (click to enlarge)
|


