Difference between revisions of "Slicer4:Download Data"
| (15 intermediate revisions by the same user not shown) | |||
| Line 48: | Line 48: | ||
| − | = | + | =Development status= |
*A. Support for local customization | *A. Support for local customization | ||
| − | 1. Add SQL schemas to link a resource to a template. '''Done''' | + | '''1.''' Add SQL schemas to link a resource to a template. '''Done''' |
| − | 2. Add support for administrators to create/edit links between resources | + | '''2.''' Add support for administrators to create/edit links between resources |
templates. '''Done''' | templates. '''Done''' | ||
| − | 3. Modify the core MIDAS to support templates at the resource level. '''Done''' (communities, collections) | + | '''3.''' Modify the core MIDAS to support templates at the resource level. '''Done''' (communities, collections) |
*B. Specific Customization for NAMIC datasets | *B. Specific Customization for NAMIC datasets | ||
| − | 1. Display of the download page at the “collection” level according to the layout | + | '''1.''' Display of the download page at the “collection” level according to the layout |
the wiki. | the wiki. | ||
| − | |||
| − | |||
| − | |||
| − | |||
| − | |||
| − | |||
| − | |||
| − | |||
| − | |||
| − | |||
| − | + | -Layout : '''Done''' | |
| − | + | -Download All: '''Done''' | |
| − | ''' | + | -Download All with mrml: '''Done''' |
| + | |||
| + | -Download single bitstream: '''Done''' | ||
| + | |||
| + | -Download single bitstream with mrml: '''Done''' | ||
| + | |||
| + | -Download single resource: '''Done''' | ||
| + | |||
| + | -Download single resource with mrml: '''Done''' | ||
| + | |||
| + | -Show Items information: '''Done''' | ||
| + | |||
| + | -Show Bitstreams Metadata: '''Done''' | ||
| + | |||
| + | '''2.''' Support for manually replacing a thumbnails '''Done''' | ||
| + | |||
| + | '''3.''' Implementation of javascript support to extend description on mouse over. '''Done''' (community page) | ||
| + | |||
| + | *C. Testing phase '''Done''' | ||
| + | |||
| + | *D. Upgrade of the MIDAS server '''Done''' | ||
| + | |||
| + | == Demo == | ||
| + | |||
| + | http://insight-journal.org/midas/collection/view/171 | ||
| + | |||
| + | == Screenshots == | ||
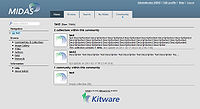
*Community level | *Community level | ||
| Line 85: | Line 101: | ||
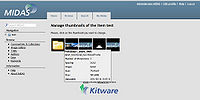
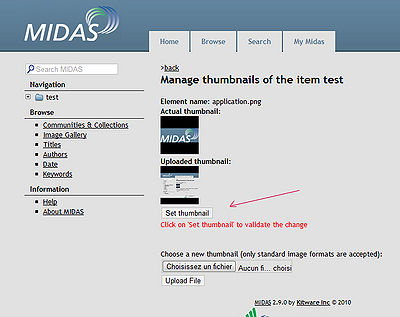
*Manage thumbnails | *Manage thumbnails | ||
[[File:Midas-slicer-screenshot3.jpg|200px]] | [[File:Midas-slicer-screenshot3.jpg|200px]] | ||
| + | |||
| + | == How to link a template to a resource== | ||
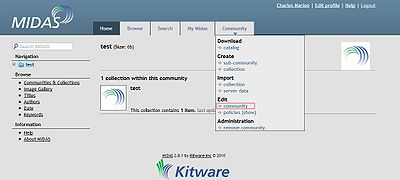
| + | First, go resource edit page: | ||
| + | |||
| + | [[File:Midas-slicer-screenshot-link0.jpg|400px]] | ||
| + | |||
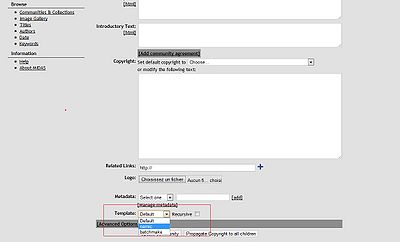
| + | Then select the template you want to use: | ||
| + | |||
| + | [[File:Midas-slicer-screenshot-link1.jpg|400px]] | ||
| + | |||
| + | You can recursively apply the template. (All the children of the resource will use the selected template) | ||
| + | |||
| + | == How to upload new files== | ||
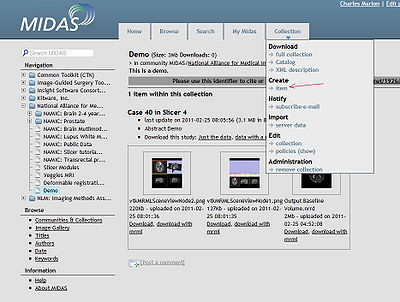
| + | First, go a collection page and create an item: | ||
| + | |||
| + | [[File:Midas-slicer-screenshot-upload0.jpg|400px]] | ||
| + | |||
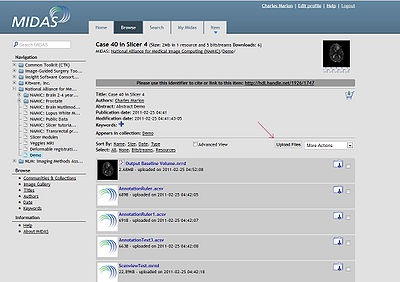
| + | Click on "Upload Files": | ||
| + | |||
| + | [[File:Midas-slicer-screenshot-upload1.jpg|400px]] | ||
| + | |||
| + | Select the files you want to upload (you can select multiple files) | ||
| + | |||
| + | [[File:Midas-slicer-screenshot-upload2.jpg|400px]] | ||
| + | |||
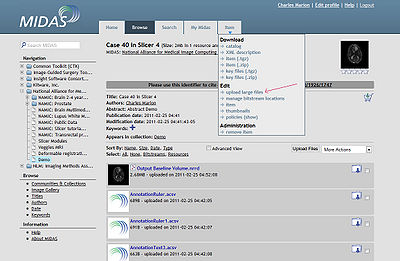
| + | If Midas warns you that a file is too big, use the "large files" tool: | ||
| + | |||
| + | [[File:Midas-slicer-screenshot-upload4.jpg|400px]] | ||
| + | |||
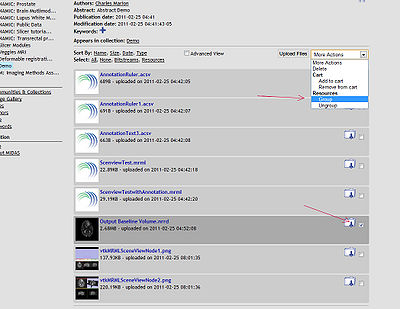
| + | When your files are uploaded, you can ask midas to create resources. If you do that, Midas will analyze the selected files and try to find the metadata: | ||
| + | |||
| + | [[File:Midas-slicer-screenshot-upload5.jpg|400px]] | ||
| + | |||
| + | == How to change a thumbnail== | ||
| + | First, go the an item page: | ||
| + | |||
| + | [[File:Midas-slicer-screenshot2bis.jpg|400px]] | ||
| + | |||
| + | Then go a the menu and click on "thumbnails": | ||
| + | |||
| + | [[File:Midas-slicer-screenshot4.jpg|400px]] | ||
| + | |||
| + | Select the thumbnail you want to change: | ||
| + | |||
| + | [[File:Midas-slicer-screenshot3.jpg|400px]] | ||
| + | |||
| + | Upload a new image (the application will resize the image) | ||
| + | |||
| + | [[File:Midas-slicer-screenshot5.jpg|400px]] | ||
| + | |||
| + | If you like the new thumbnail, click on "Set thumbnail" to finalize the modification | ||
| + | |||
| + | [[File:Midas-slicer-screenshot6.jpg|400px]] | ||
Latest revision as of 09:05, 29 June 2011
Home < Slicer4:Download DataBack to Slicer 4 Developer Projects
Contents
Introduction
- This is a first generation mock-up for a database display/download schema for Slicer
- The NA-MIC download data can be used for prototyping.
- thumbnails should be extracted for now from the center slice of the volume. Mechanism to replace manually. Down the road, we will use the thumbnail from the mrml file.
- Annotation should be extracted from the DICOM headers, if available. We will need a painless way to edit the annotation (with wiki style history). Once the slicer annotation module is working (summer 2011), we can extract information from there.
- Pack as many thumbnails as possible horizontally (based on width of browser window and font size)
- Only list one or two lines of text, the rest pops up on rollover.
- Pack densly, use space sparingly
Top Level

|
Brain: Multi-modality (sMRI, DTI, fMRI) from Schizophrenia Study There are 20 cases: ten are Normal Controls and ten are Schizophrenic. Each case includes a weighted T1 scan, a weighted T2 scan, an fMRI scan, a DTI volume, the DWI with 51 directions, and several masks and labelmaps. Available from Harvard. |
|
Brain: 2-4 Year Old from Autism Study Data for 2 autistic children and 2 normal controls (male, female) scanned at 2 years with follow up at 4 years from a 1.5T Siemens scanner. Files include structural data, tissue segmentation label map and subcortical structures segmentation. Available from UNC. |
|
Brain: White Matter Lesions for Lupus Study Data for 5 cases of Lupus White Matter Lesion patients. The data is co-registered. Each case contains: T1-weighted, T2-weighted, FLAIR, and masks for brain and lesions. Available from MIND. |
One Level Down
- Case 1, study 1
- Lupus001
- last update on 2010-04-12 14:32:11 (13.4 MB in 8 files)
- Brain MRI study of a subject with slight Lupus Erythematodes.
- Download this study: Just the data, data with a mrml file for Slicer 3.6
- Case 1, study 2
- Lupus002
- last update on 2010-04-12 14:32:11 (13.4 MB in 8 files)
- Brain MRI study of a subject with severe Lupus Erythematodes.
- Download this study: Just the data, data with a mrml file for Slicer 3.6
Development status
- A. Support for local customization
1. Add SQL schemas to link a resource to a template. Done
2. Add support for administrators to create/edit links between resources templates. Done
3. Modify the core MIDAS to support templates at the resource level. Done (communities, collections)
- B. Specific Customization for NAMIC datasets
1. Display of the download page at the “collection” level according to the layout the wiki.
-Layout : Done
-Download All: Done
-Download All with mrml: Done
-Download single bitstream: Done
-Download single bitstream with mrml: Done
-Download single resource: Done
-Download single resource with mrml: Done
-Show Items information: Done
-Show Bitstreams Metadata: Done
2. Support for manually replacing a thumbnails Done
3. Implementation of javascript support to extend description on mouse over. Done (community page)
- C. Testing phase Done
- D. Upgrade of the MIDAS server Done
Demo
http://insight-journal.org/midas/collection/view/171
Screenshots
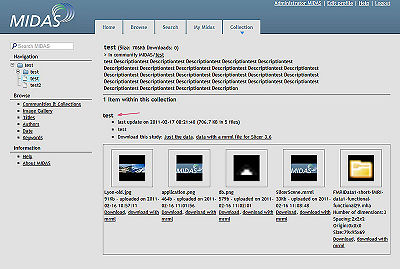
- Community level
- Collection level
- Manage thumbnails
How to link a template to a resource
First, go resource edit page:
Then select the template you want to use:
You can recursively apply the template. (All the children of the resource will use the selected template)
How to upload new files
First, go a collection page and create an item:
Click on "Upload Files":
Select the files you want to upload (you can select multiple files)
If Midas warns you that a file is too big, use the "large files" tool:
When your files are uploaded, you can ask midas to create resources. If you do that, Midas will analyze the selected files and try to find the metadata:
How to change a thumbnail
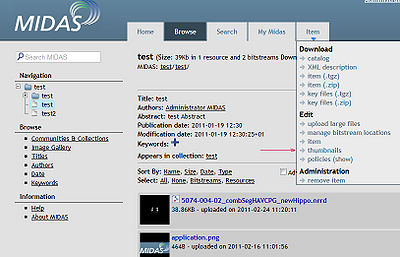
First, go the an item page:
Then go a the menu and click on "thumbnails":
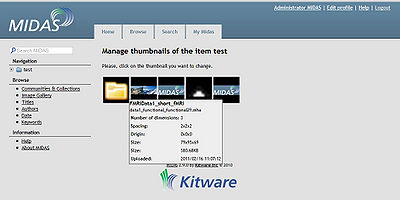
Select the thumbnail you want to change:
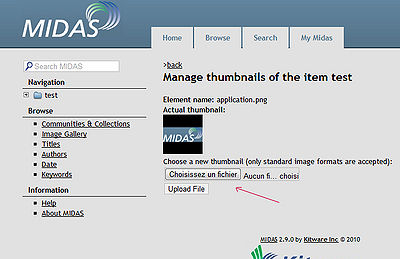
Upload a new image (the application will resize the image)
If you like the new thumbnail, click on "Set thumbnail" to finalize the modification


